Each flight log entry usually
represents a launch or test day, and describes the
events that took place.
Click on an image to view a larger image, and
click the
browser's BACK button to return back to the
page.
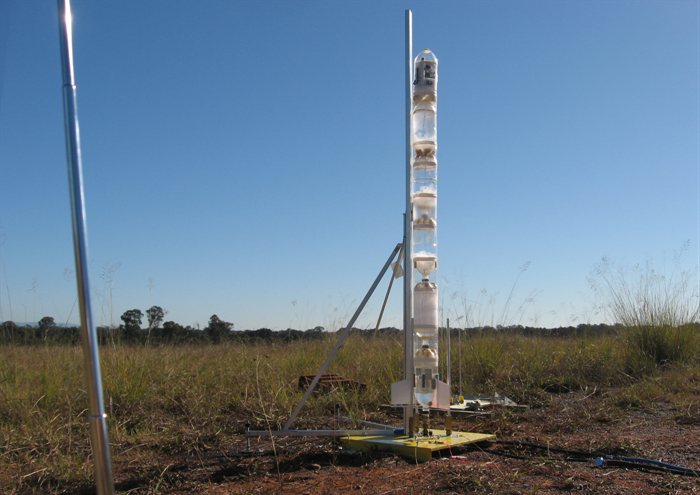
Day 59 - Acceleron IV and Tachyon
III go to 617'
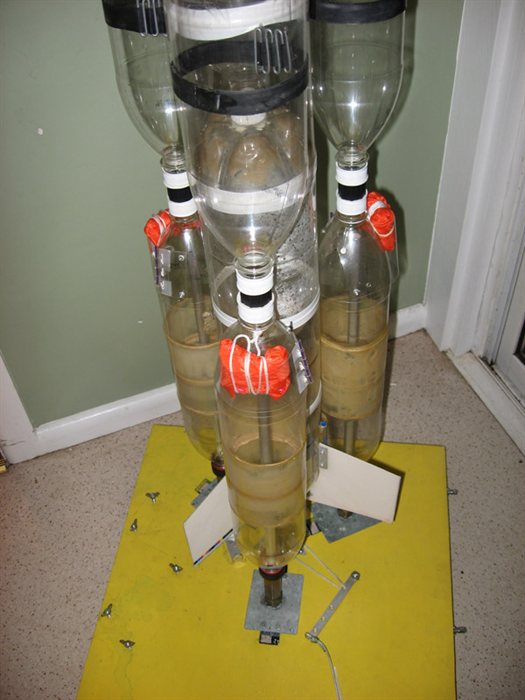
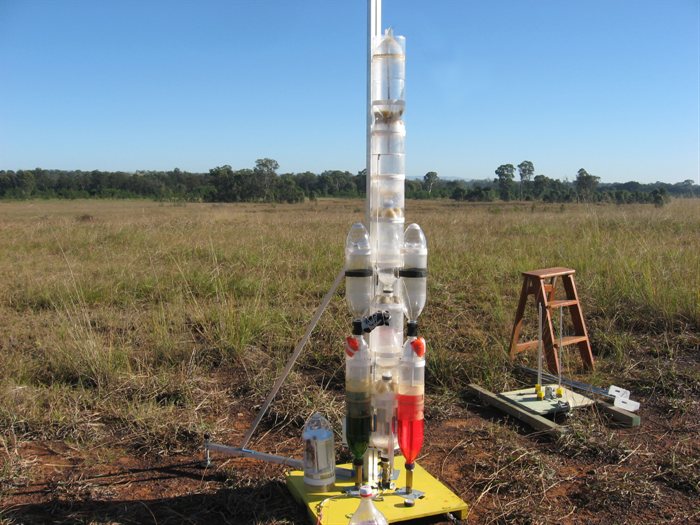
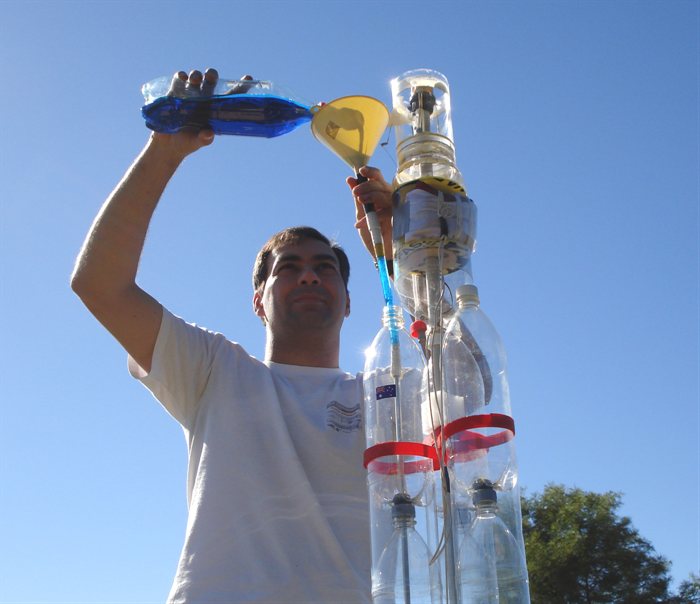
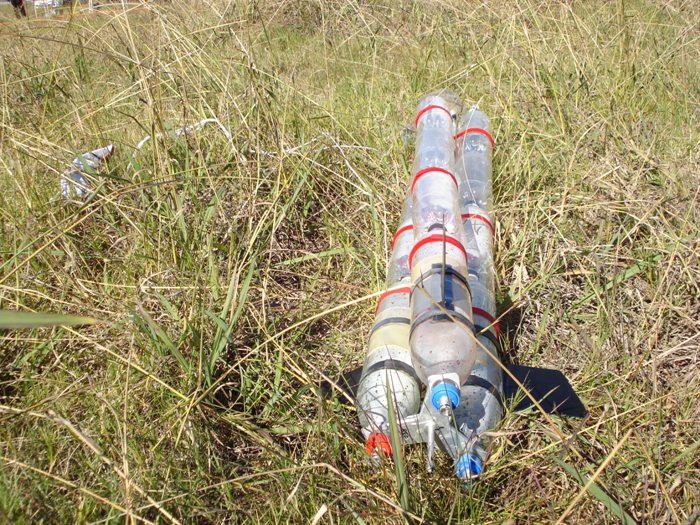
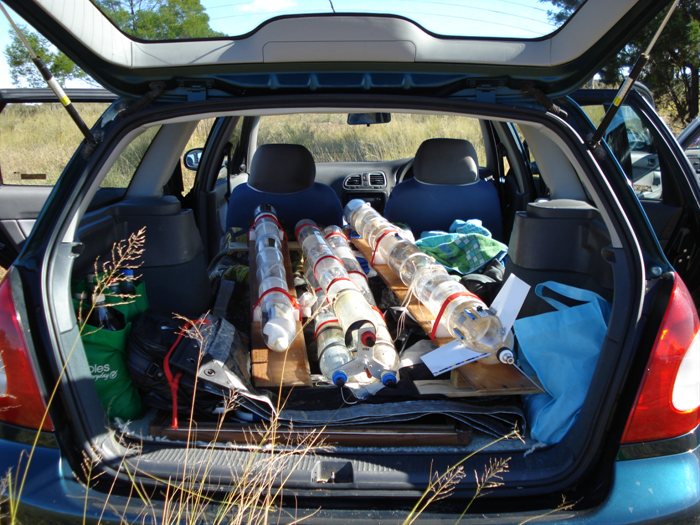
Polaron V assembled and ready for testing.
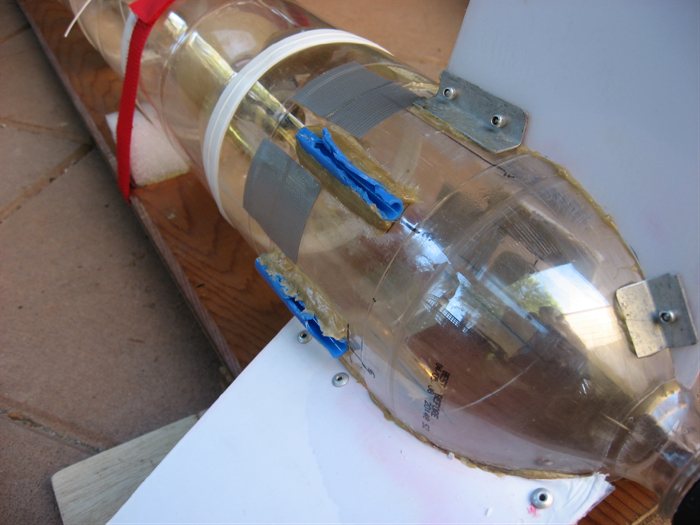
A detail showing where the booster
parachutes are stored.
Pressure testing kids bikes ... errr I mean
rockets... it's just off screen.
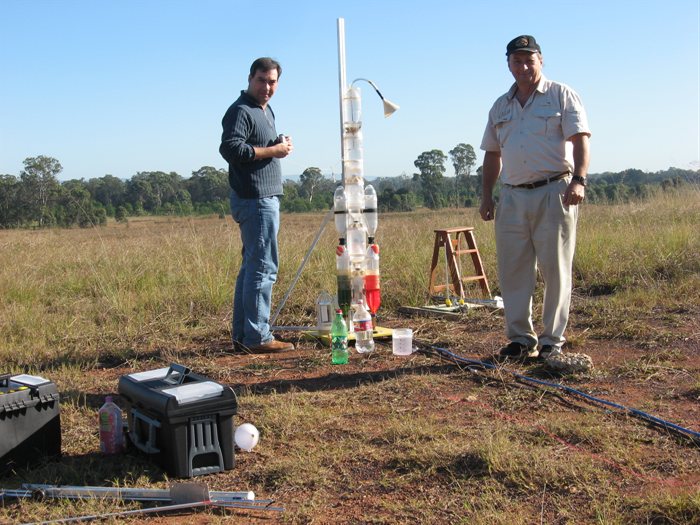
Setting up at Doonside. No that is not a
desk lamp.
The nosecone is sitting on the launcher. We
remove it so we can fill the rocket from the
top.
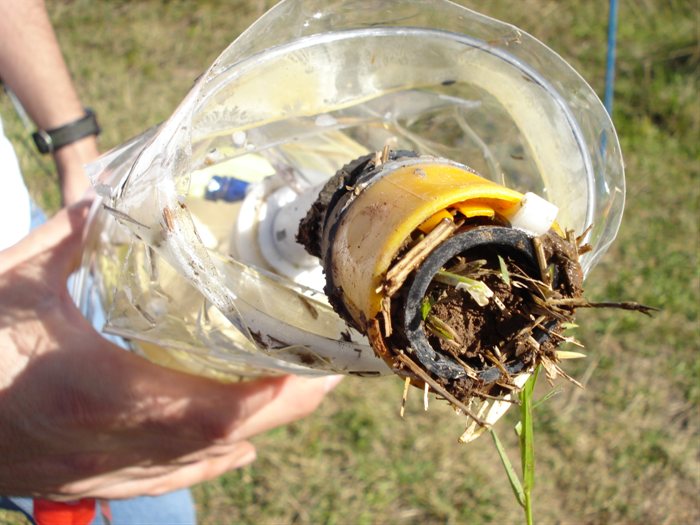
At 130psi one booster ripped through the
retaining tubes. The tubes failed but glue
didn't.
We removed the remaining boosters...
.... and launched the main stage by itself.
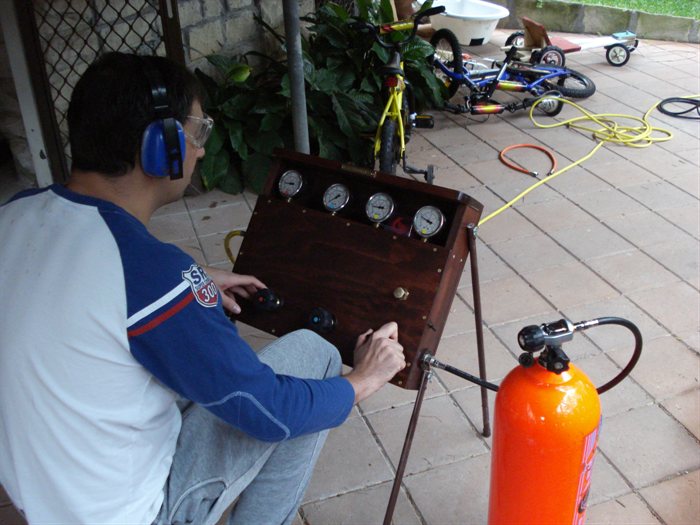
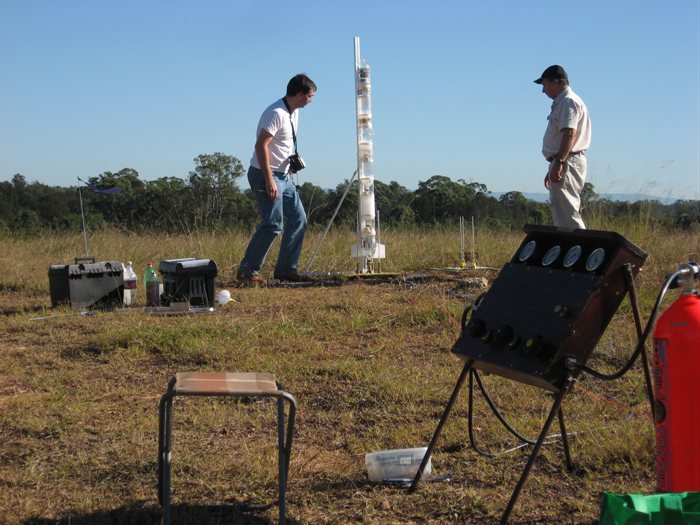
New control panel in the foreground.
The altimeter plot showing it didn't go very
high without the boosters.
Acceleron takes 6L of coloured water.
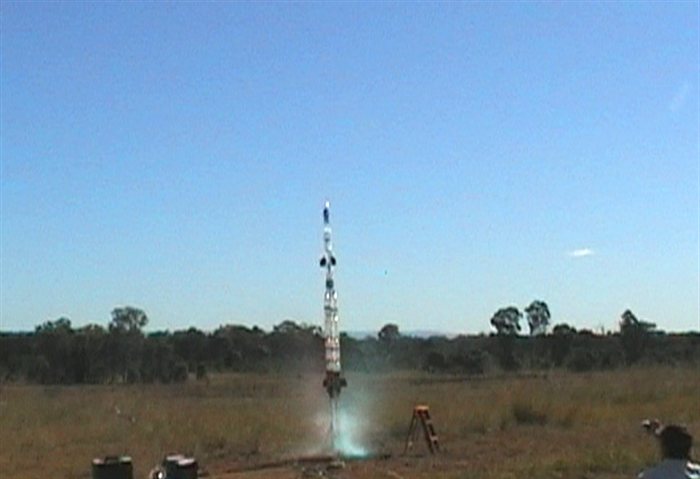
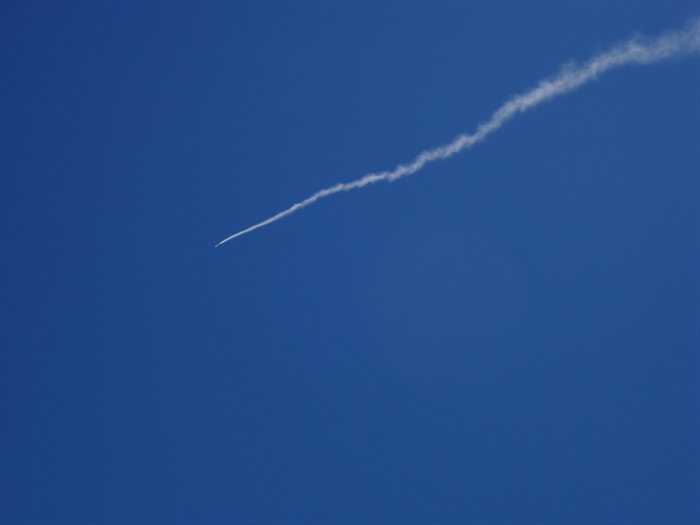
Captured video frame of take off.
Air pulse begining at 48 feet.
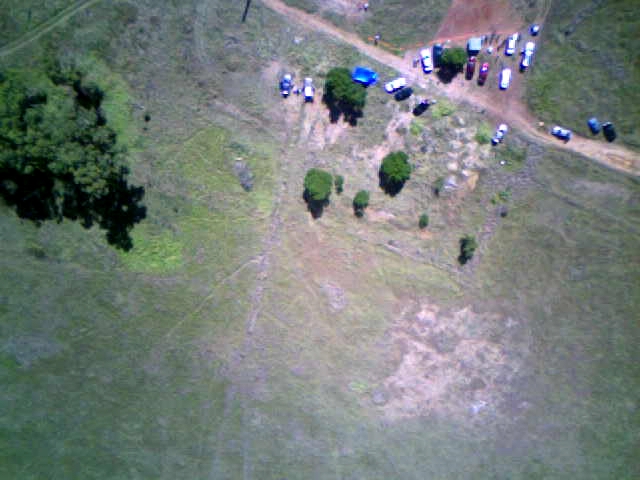
A view of the ground before reaching apogee.
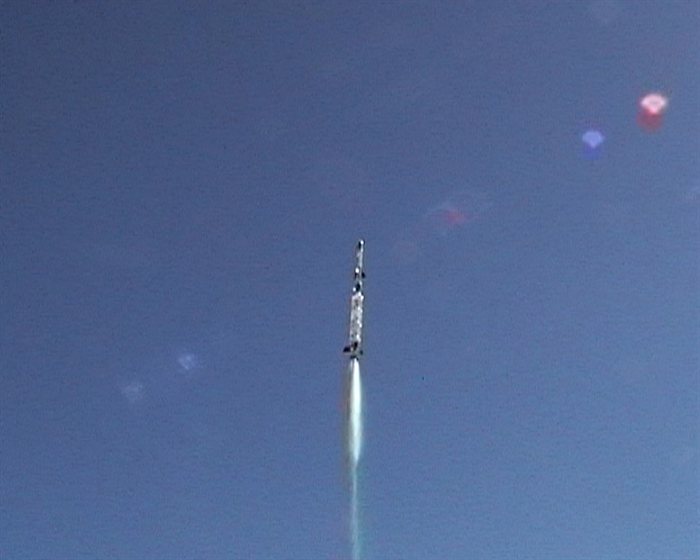
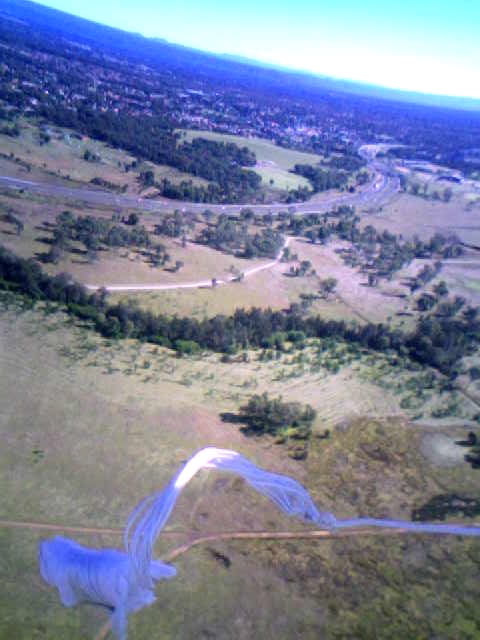
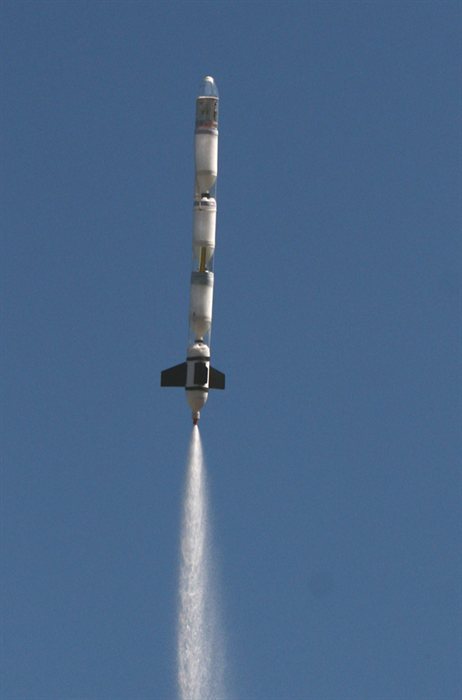
Parachute comes out at apogee. 617' (188m)
above ground.
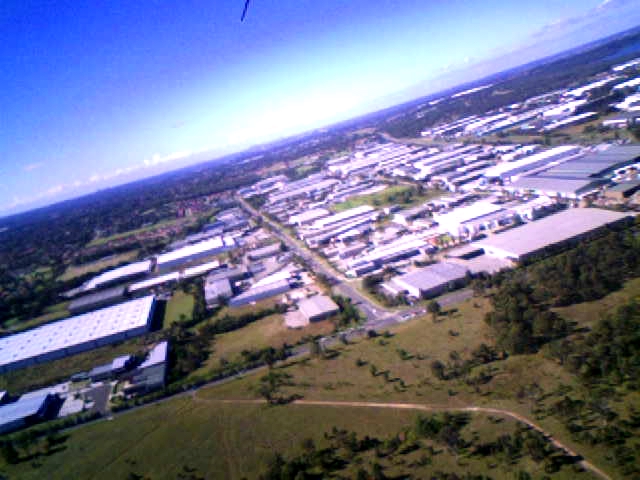
Looking back at the industrial park while
falling under parachute.
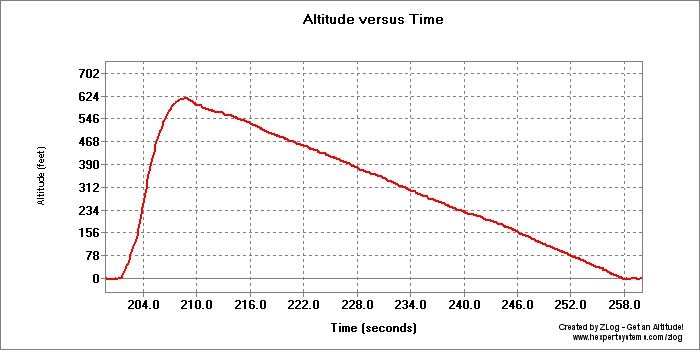
Altimeter plot of the flight.
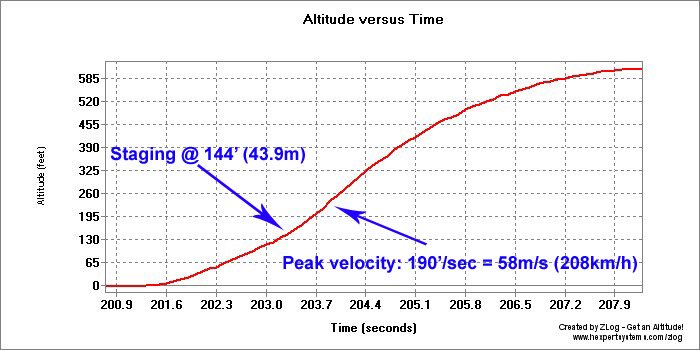
Detail of the altimeter data.
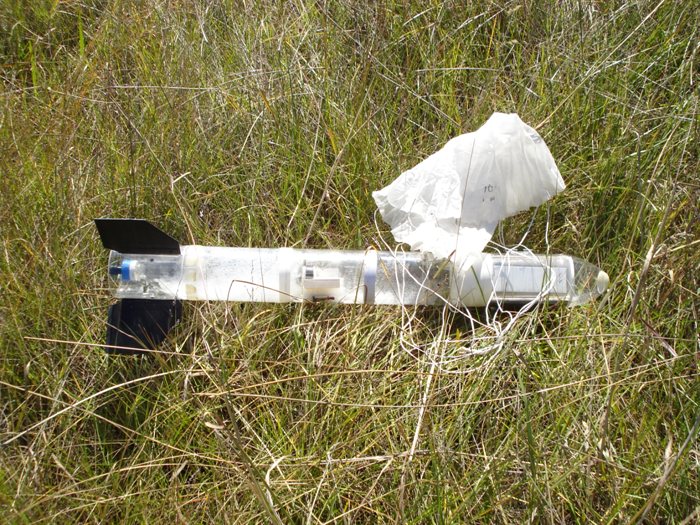
Tachyon III still smoldering after re-entry
through the atmosphere.
Unfortunately Acceleron bit the dust when
the chute failed to open.
Hmmmm... might have to dust off the staging
mechanism a little.
All the electronics survived to fly another
day.
J4 IV soon after liftoff.
Foam always makes a great looking trail.
Right time to go home....
Date:3rd May 2008 (7:45am -
2pm)
Location:Doonside
Conditions:Temp: 18
degrees C, wind speed 10-15km/h SW gusting
around midday, cloud cover 0/8
Team Members at Event:
GK, PK, Paul K + Members of NSWRA and
spectators.
After the NSWRA launch event was
postponed last week due to bad weather we
were eager to try the new Polaron V rocket
with the bigger boosters. The weather was
great this week with an occasional stronger
gust but the wind was at least in a
favourable direction - away from the big
rocket eating trees.
Before we get to launch day events here
are a few details about the rocket itself:
Polaron V
The Polaron V rocket basically remains in
the same configuration as the Polaron IV
rocket with the exception of an extra 2L
bottle in the stack. This gives the rocket a
capacity of 10L.
The Gluon boosters have had their
capacity also increased by 1.25L each,
giving them a total of 3.35L. The boosters
are attached the same way to the main stage
as described earlier. Due to the extra
length of the boosters we wanted to support
them as high as possible up the main stage
so that aerodynamic forces could not pull
them off. There was a major problem though
in attaching them further up since the top
bottle on the booster has to be removed in
order for the lower spliced pair to be
filled with water on the launch pad. This
prevented us from permanently gluing the pin
to the top bottle. Instead, we made
essentially a large rubber band from an old
bicycle tire and the base of the pin was
made into a comb shape that allowed the
rubber band to be threaded through.
This allows us to place the lower portion
of the booster on the pad, fill it with
water and then screw on the Tornado coupling
and into the other side of the coupling we
screw in the upper bottle. When it�s all
tightened up, we adjust the pin and rubber
band so that the pin fits inside the upper
tube on the main stage. The rubber band is
quite tight on the bottle so there is
virtually no movement from the pin.
Because the boosters are now getting
quite heavy, we have added a small parachute
to each of them. In order to keep things
simple, there is a small flap of PET plastic
that is attached to the top of the lower
booster section. The parachute is simply
tucked in behind this. There are no springs
or rubber bands to eject the parachute, it
just slides off. The flap is kept closed
with a piano hinge type arrangement and the
hinge pin is just a piece of wire attached
to the main stage. As the booster drops away
the wire is pulled out of the hinge and the
flap springs open releasing the parachute.
Since the booster is still traveling quite
quickly when that happens we have used
stronger string and an extra couple of loops
of the string around the chute in order for
the parachute to take a little extra time to
open.
Tornado Couplings
After last weeks development of a tornado
coupling made of common irrigation parts we
discovered during further testing that they
held only a little more than 130psi before
springing a leak. This was marginal for what
we wanted to do with them, so we started
looking for alternatives.
During the tests we also found that at
the higher pressures, over 100psi on
occasion there was a small leak between the
cap and the bottle. This was easily fixed
with a BS119 o-ring around the bottle that
just fit under the cap of the coupling.
Trevor sent us a couple of tornado
couplings about 6 months ago that he had
re-threaded from standard �� polypropylene
BSP sockets. We tested these couplings and
they worked really well. Requiring just two
o-rings to seal them up.
We would have liked more like it but
unfortunately our little lathe couldn�t cut
such a coarse thread, at least it didn�t
appear on any of the thread cutting gear
ratios charts.
Dad again came to the rescue and figured
out what gear ratio would be needed and
luckily we had the right gears in the box,
but they did not fit on the gear brackets.
(Probably why it was not listed) So dad
modified the brackets on the lathe and got
them to fit. He then proceeded to machine up
coupling out of a solid piece of PVC. Yee
haa.. we were back in business. Being able
to cut bottle threads opens up the
capability to make other types of couplings,
staging mechanisms, one piece nozzles etc.
We tested the new coupling to 130psi
without any sign of stress or leaks. Being
one-component construction makes them ideal.
These also use the BS119 o-rings against the
bottle to seal them.
These couplings are even better because
of their full bore 22mm hole that is almost
twice the cross sectional area of the 15mm
ones we made last week. When compared to the
8mm Robinson coupling these Tornado
couplings have a cross-sectional area of 7.6
times bigger than the Robinson couplings we
have been using. This should translate to
better efficiency of water and air flow
between the rocket segments. The new Gluon
II boosters use these couplings.
Launch Day Events
We turned up early at the launch
site because we knew it was going to
take a while to set up the rocket. There
are a lot of things that need to get
configured with this rocket. It took
about 40 minutes to set up camp and get
the launchers assembled.
On this day we were going to test
the new control panel on its first
official dual pressure launch. We have
been using the panel now for all
pressure testing for the last few weeks.
As we brought up the pressure on the
main stage we closed off the main stage
valve and continued pressurising the
boosters. We were pretty much ready to
launch when one of the boosters took off
unexpectedly by itself. Surprisingly it
went straight up although not designed
for stable flight. Its parachute opened
right around burnout, so it was a pretty
violent stop, but floated back down
undamaged. Upon closer inspection of
what went wrong we noticed that the pins
on the booster basically ripped the full
length of the plastic tubes they were
in. These tubes are made out of plastic
ball point pens so we would have
expected them to be quite strong. (See
photos on left). We continue to be
amazed at the strength of the PL premium
glue and the fact that it held to the
pins and the tube.
We are still puzzled why the tubes
failed. We would have expected them to
be able to hold much more than that.
With the pressure that was in the
boosters at the time there would have
been perhaps 6 Kg of force on each of
the pins. The top tube was also ripped
its full length. What is even more
interesting is that the pin on the top
of the booster is essentially only
attached by a large rubber band! Perhaps
there was a small movement in the
booster that made the pins hit the edge
of the tubes rather than just pressing
against them? Perhaps there was a small
crack in one of the tubes that weakened
them and that could have started it? We
really don't know at this stage.
We considered launching the main
stage with just the two boosters, but
that could have ended badly especially
with other people and cars around. So we
decided to remove the boosters and just
launch the rocket by itself. We filled
it up with water rather than with foam,
since we needed the initial thrust to
get up to speed.
The rocket went up well and landed
without fuss under parachute. Without
the boosters it only reached 251 feet
(76 m).
Next we set up Acceleron IV with the
Tachyon III sustainer. We fitted the
camera in the nosecone again, but a lot
more streamlined this time. We filled
the booster with water to its full 2L
capacity. Our limiting factor is the
length of the fill tube since the air
inlet holes have to be above water
level.
2L per segment is about what the
simulator recommends for this rocket.
Despite this recommendation on the last
launch day we only put 1.5L in each in
order to reduce the overall weight near
the tail, to keep the Cg a bit more
forward, although we knew we would not
get maximum altitude with less water.
The rocket was filled to 130psi and
launched. Because of the extra water the
boost lasted visibly longer. The second
stage separated right on cue and
continued vertically with a deploy just
a few feet before apogee (as seen from
onboard video). The booster, however,
failed to open its parachute and slammed
nose first into the ground with a
beautiful thud. We took a nice core
sample with the staging mechanism and
I'm pretty sure that at least a few ants
on the nearby anthill had a great view
of a "dinosaur extinction type event".
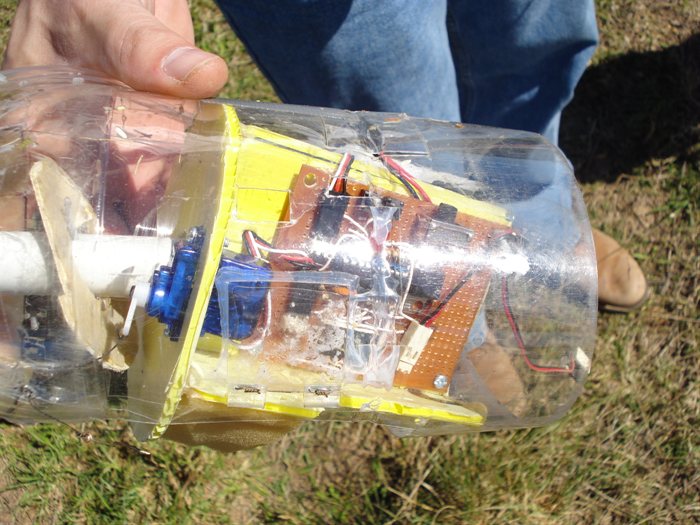
The payload section was pretty much
destroyed, but the electronics survived
unharmed, and the two servos popped open
but are fixable with a little epoxy.
While it's always disappointing to have
to do a rebuild, it won't be so bad
since most of the components survived
and we know how to rebuild it. We will
attempt to make the whole mechanism
lighter as the old one weighed over 400
grams.
The central aluminium pipe was bent
slightly and some of the bottles on the
booster were a little buckled, but don't
look like they will need to be replaced.
On a positive note though, the second
stage flew to 617' (188 m) which
is our highest directly measured
altitude to date. The flight time was
also our longest to date and stands at
56.3 seconds.
Looking at the altimeter data and
ground video for timing, we know that
water ran out at T+0.92 seconds
at an altitude of 48' (14.6m) and
staging occurred at T+ 1.96 seconds
at an altitude of 144' (43.9m).
Peak velocity for the second stage was
~190�/sec = 58m/s = 208 km/h at
~220� (67m).
Our only other higher flight based
only on estimates was 630' last year but
had a much greater degree of error.
The last two launches of the day
were carried out by J4 IV since we were
running out of rockets fast. Both
launches went well and both had good
landings.
(If the video does not play, try the latest
Flash player from Macromedia)