
Introduction
This tutorial describes how to make panoramic images from a video
sequences captured by small cameras such as the MD80 clone or keychain cameras. You will
need
Photoshop and
VirtualDub.
Acknowledgements
We originally learned of the photo stitching technique in
PhotoShop from US Water Rockets. They now have a tutorial for
using different set of tools here:
http://waterrockets.multiply.com/journal/item/170/Aerial_Photograph_Panorama_Tutorial_in_3_easy_steps
Procedure
- Go fly your rocket and capture some video. Note that not
all video is suitable for making quality panoramas. (See
notes below)
- Download the video from the camera to your computer.
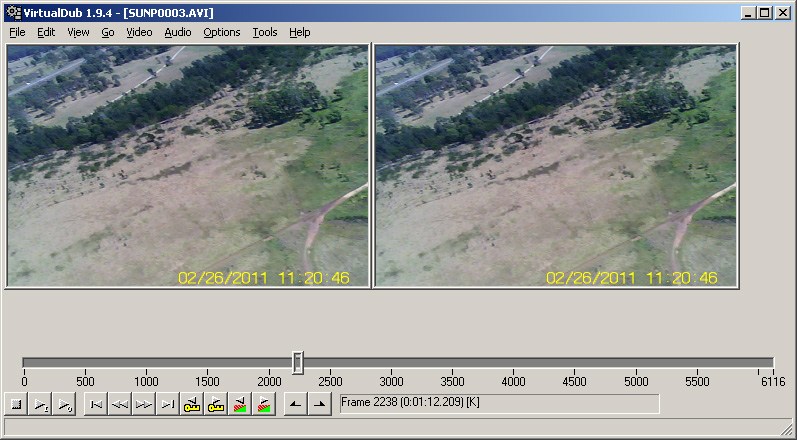
- Open the video in Virtual Dub.
- Depending on the camera you use to capture the video you
may want to apply a couple of filters first. If you use the
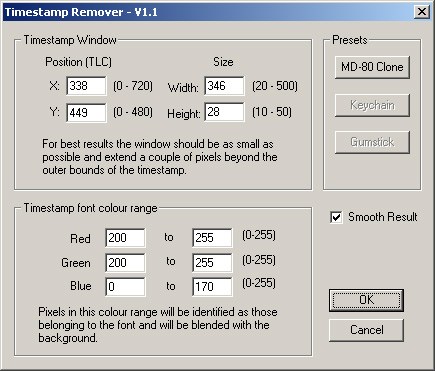
MD80 clone or the keychain camera and the video has the
permanent timestamp you can add our filter first (see the
timestamp remover filter
for details) and then add the resize filter, as the cameras
stretch a 640 x 480 native resolution to 720 x 480 giving
you a
distorted image. Resizing it back to 640 x 480 restores the
correct aspect ratio to the image contents.
If the video was shot through a mirror such as when looking
downwards, you will want to also apply the flip horizontal
filter to correct that. Make sure you apply this filter
after the timestamp removal.
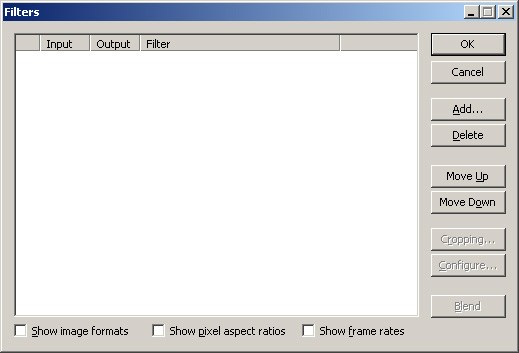
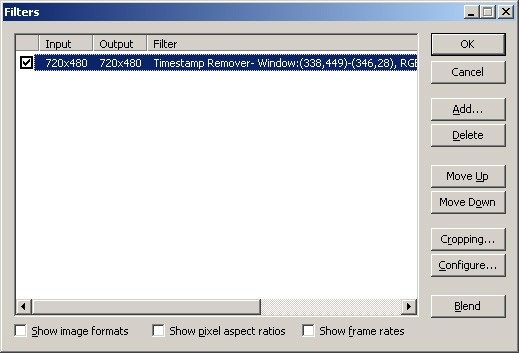
In VirtualDub select Video > Filters from the menu.

- This opens the Filters dialog. Click on the Add..
button.
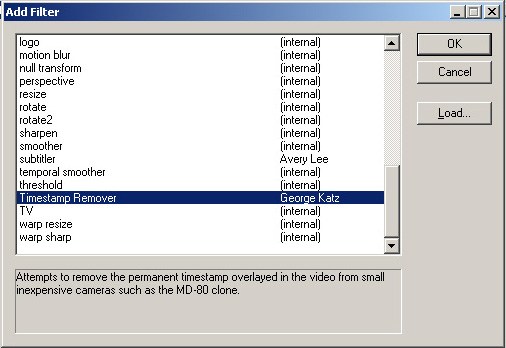
- Choose the Timestamp Remover filter and click
OK. If you don't have the filter installed see the
installation
procedure.
- Accept the default settings and click OK.
- The filter is added to the Filters list. Click Add...
again.
- Select the resize filter and click OK.
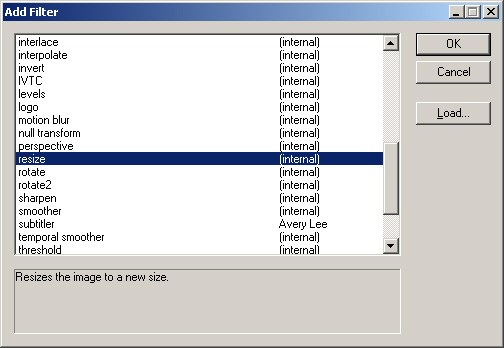
- Set Aspect ratio to Disabled. Select New size
Absolute and type in 640 x 480. Click OK.

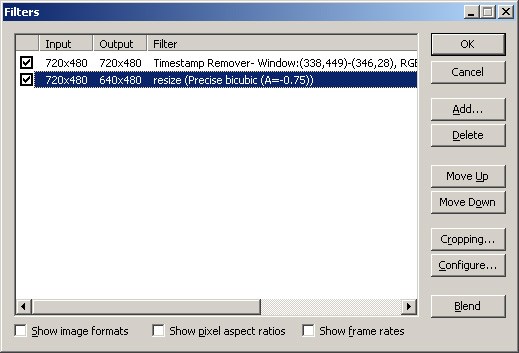
- The resize filter should be second in the chain. Click
OK.
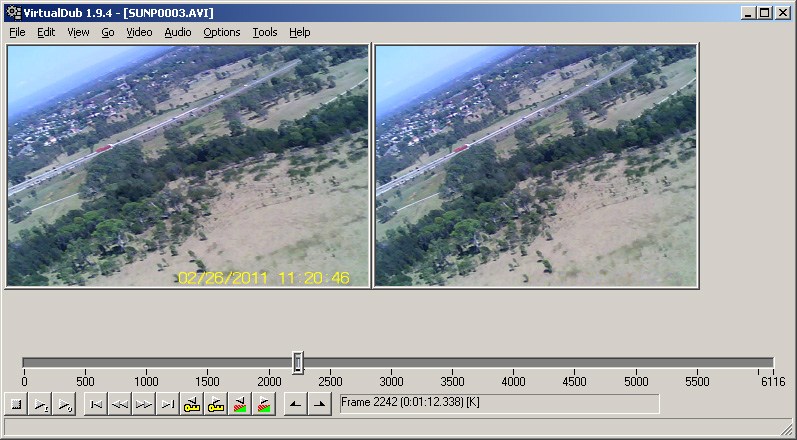
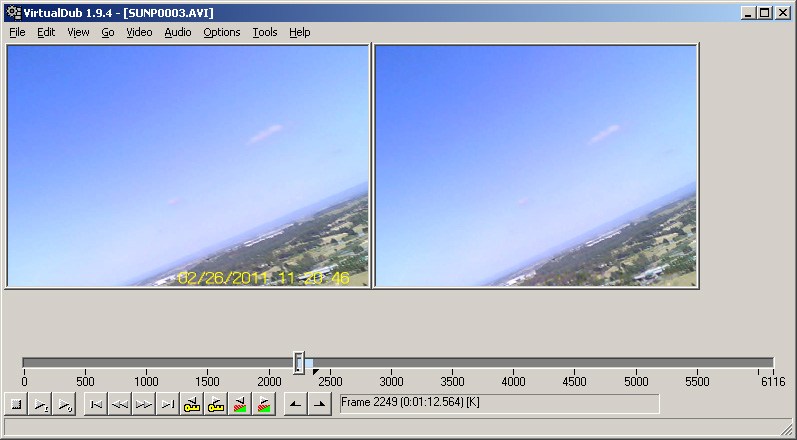
- Find the first frame you would like to start your
panorama on and press the HOME button. This marks the start of the
sequence.
(Left view shows original, right view shows filtered video)
- Find the end of the panorama image and press the END
button. This marks the end of the sequence. How many frames you choose is up to
you, but generally 20 to 30 is a good rule of thumb,
though certainly 3 or 50 can be used.
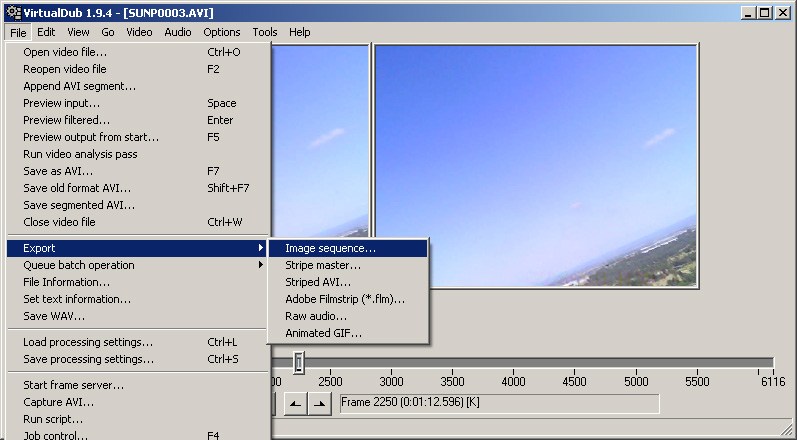
- Choose File > Export > Image sequence ... from the menu.
- Give the files a name and location. Choose the JPEG option and set the quality to
100%
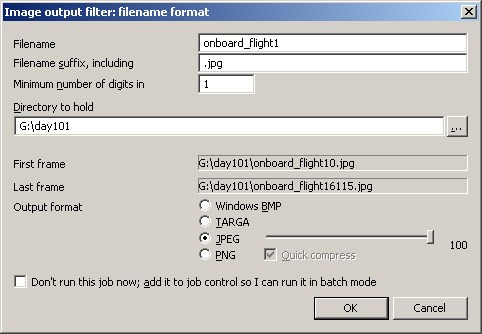
- Click OK and allow VirtualDub to export the
individual frames.
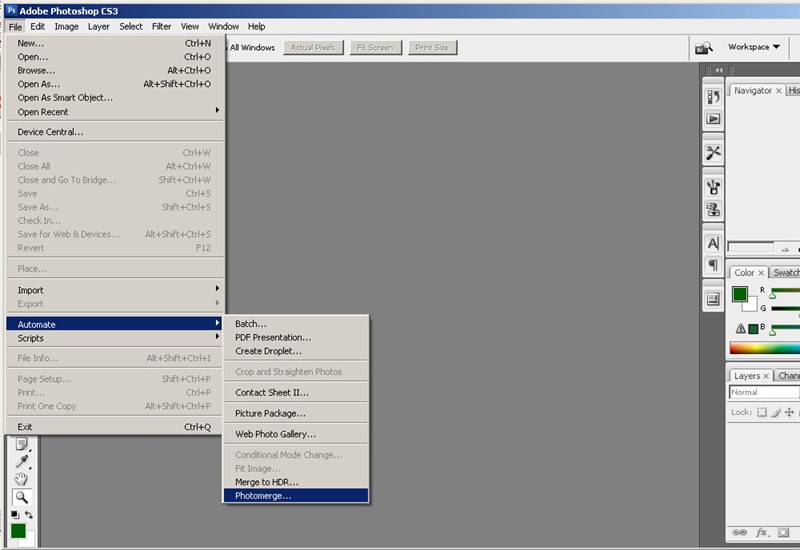
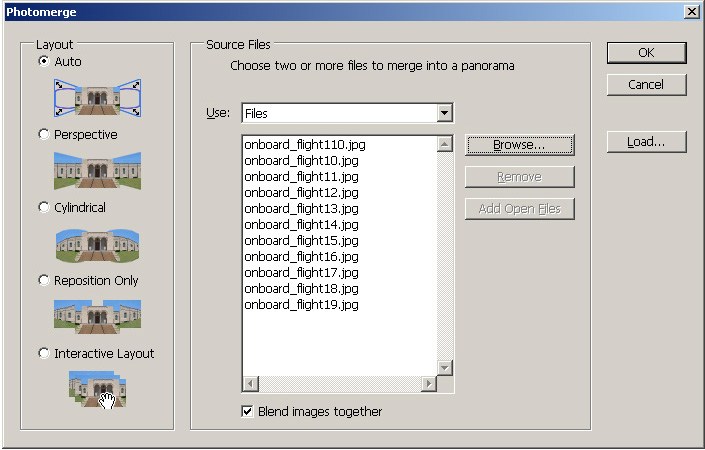
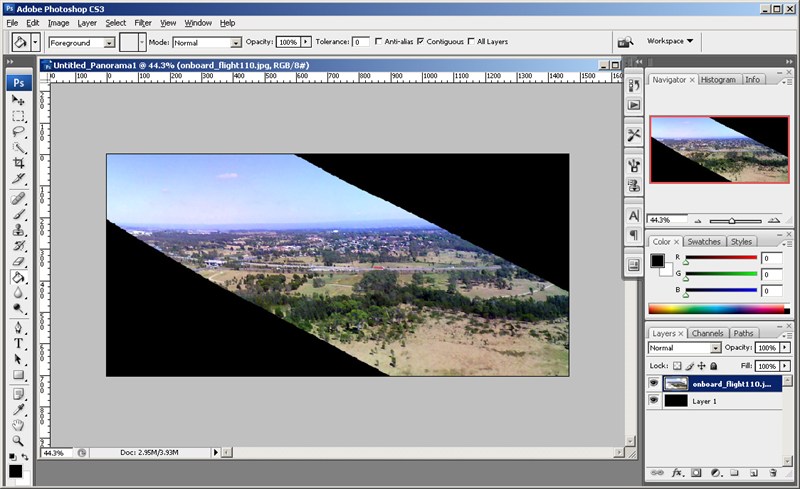
- Open Photoshop and select File > Automate > Photomerge...
from the menu. Depending on what version of Photoshop you
are using will depend on what photomerge options you have
available.
- If you are using CS3 then select the files that were
just exported from VirtualDub by clicking Browse. Select
Layout Auto and click OK.
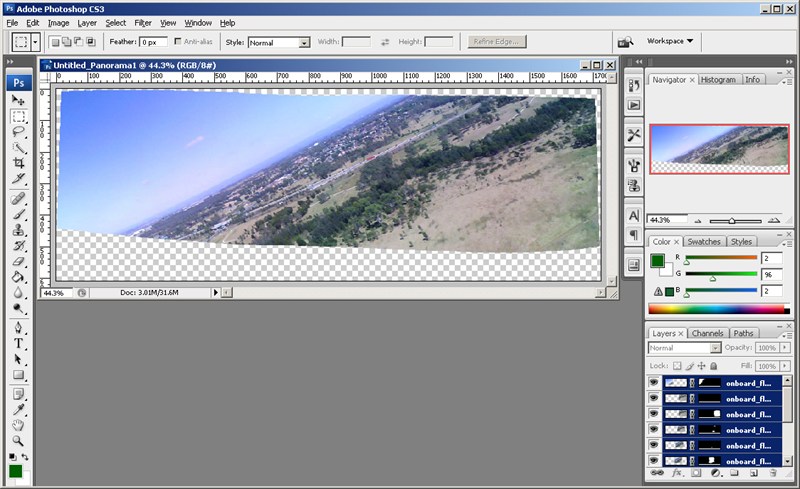
- Let Photoshop assemble the image for you. How well
Photoshop does will depend on the images. It may combine all
of them or only some of them. When all else
fails you can always assemble them manually by choosing the
Interactive Layout above. Here is more information on
how to
photomerge interactively. You can also try various
blending options with Photomerge. Once the images have been
assembled they will be shown as a series of layers.
- Choose Layer > Flatten Image from the menu to
collapse all the layers to a single image.
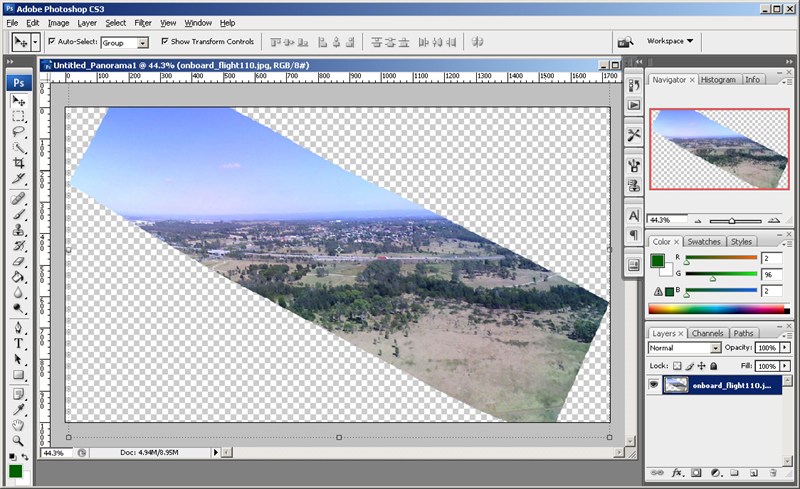
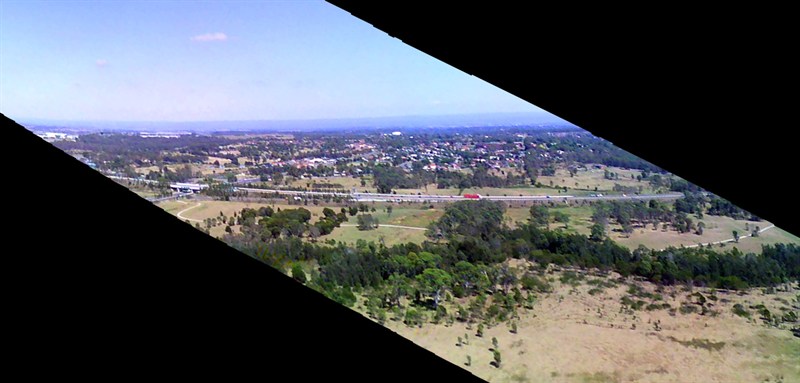
- Once the image is assembled you usually need to clean it
up a little further. Rotate the image so the horizon is level. This makes it
more pleasant to look at.
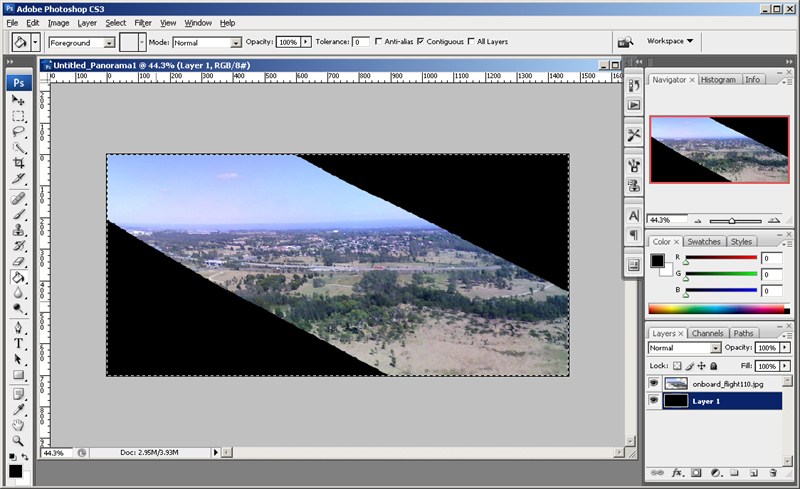
- Crop the image as desired. More often than not the
panorama will have an irregular shape and does not lend
itself too much to cropping to a rectangular shape without
loosing too much detail. Simply crop the image a little
larger and fill the holes around the edges with black or
neutral gray.
- You can also apply any other colour correction filters
at this stage. Using Image > Adjustments > Auto Levels
from the menu sometimes helps
improve the colour, as does adding a little saturation (Image
> Adjustments > Hue/Saturation.). If the image is
quite dark then using Image > Adjustments >
Shadow/Highlight also works well.
- Save your panorama and share it with others.
Tips
- To speed up processing remove alternate frames from the
image sequence before importing them into Photoshop. At 20 or
30 fps the camera produces images that overlap significantly
from frame to frame. You only really need 30-50% overlap.
- Choose only video frames from the video where the camera
is panning slowly. Very fast rocket rotation tends to
produce skewed video frames due to the low scan rate.
- Use video that does not have blur due to a low shutter
speed. This usually happens when there isn't enough light
during filming.
|

