|
Which Nozzle?
This article describes the various aspects of water rocket nozzles. Choosing the right nozzle for your
water rocket depends on a number of factors, and may change
depending on what you are trying to achieve with a particular
flight.
When choosing a nozzle for any water rocket you need to consider the
following:
- Desired flight profile. For example slow vs. fast launch.
- Minimum lift-off thrust requirement depending on the weight of
the rocket.
- Launcher type available as not all nozzles fit all launchers.
|
There are three important aspects to any nozzle:
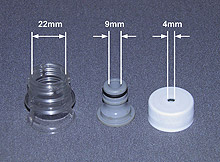
1. Nozzle Size
The nozzle size in water rockets is measured by the
narrowest internal diameter (throat) in the nozzle and is often
given in mm. The internal diameter is important because it directly
relates to the mass flow rate out of the nozzle. The larger the nozzle
the higher the thrust for a given pressure. Note that the length of the
nozzle typically isn't important although there will be slight
performance differences with variations in the length. Internally
nozzles are typically cylindrical because water is incompressible and
hence does not benefit from a
DeLaval nozzle the same way
combustion rockets do. Discussion of DeLaval or Convergent-Divergent
(CD) nozzles in water rockets is a topic of its own and is left for a
separate article. |
 |
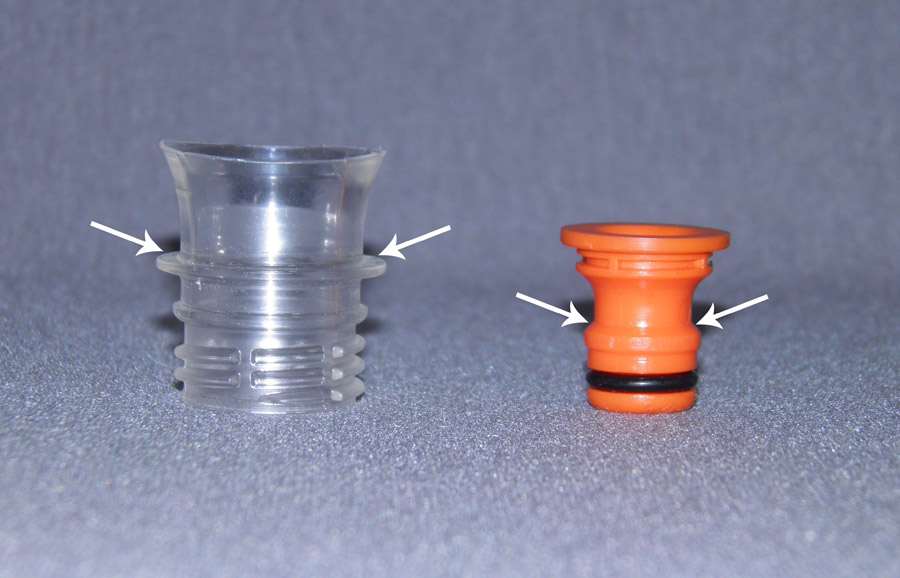
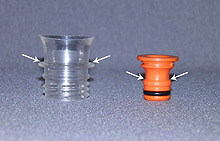
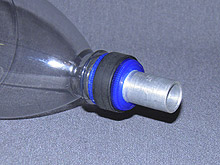
2. Retention Method
In general most nozzles are also used to hold
down the rocket on the pad. Different types of nozzles have different
retention mechanisms and as a result each will use a particular launcher
design. Some nozzles lend themselves to several different launcher
release head designs. Refer to the
Launcher article for more information
on launcher release mechanisms.
The arrows in the image show where the nozzle is held down by the
launcher. |
 |
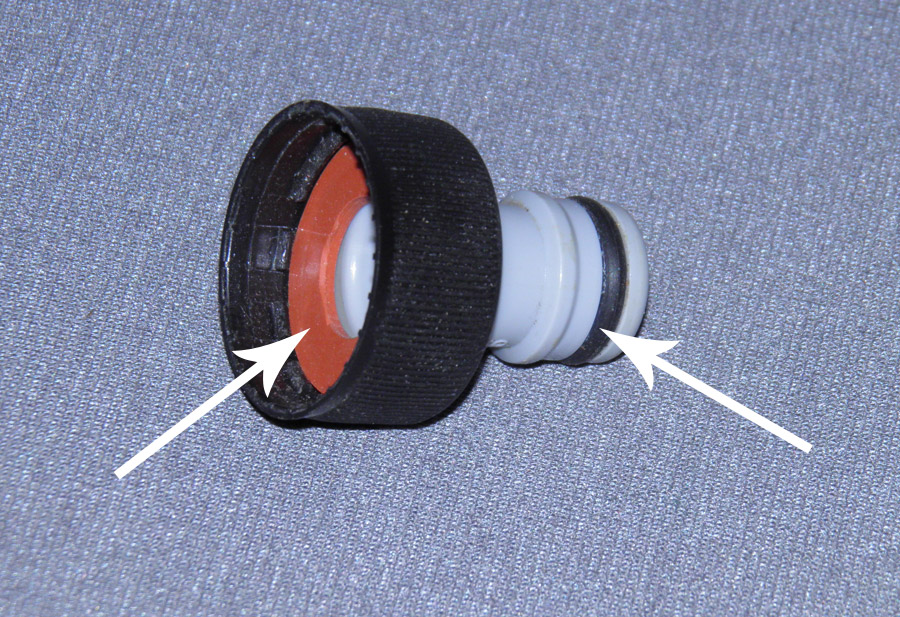
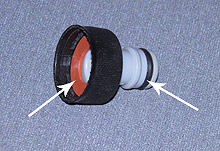
3. Seals
A nozzle may have 1 or 2 seals depending on the nozzle type. The
first seal goes between the bottle and nozzle while the second seal is
between the nozzle and the launcher. When using the bottle neck as the
nozzle then you only need one seal and that is between the nozzle and
the launcher.
Seals prevent water and air escaping through the
nozzle-launcher interface. There are various seal designs depending on
the nozzle type and release head combination. |
 |
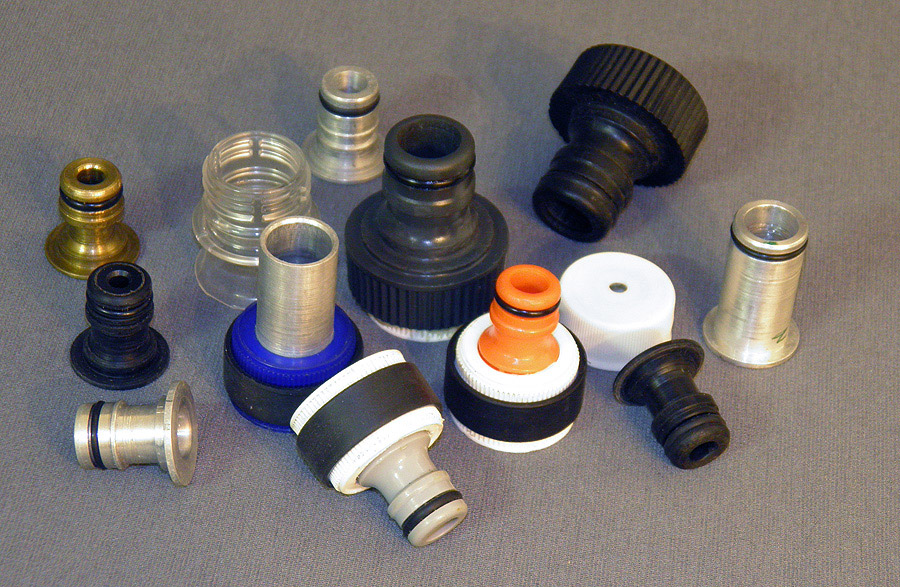
What nozzles are available?
There are several different types of nozzles commonly in use:
| Image |
Type |
Description |
 |
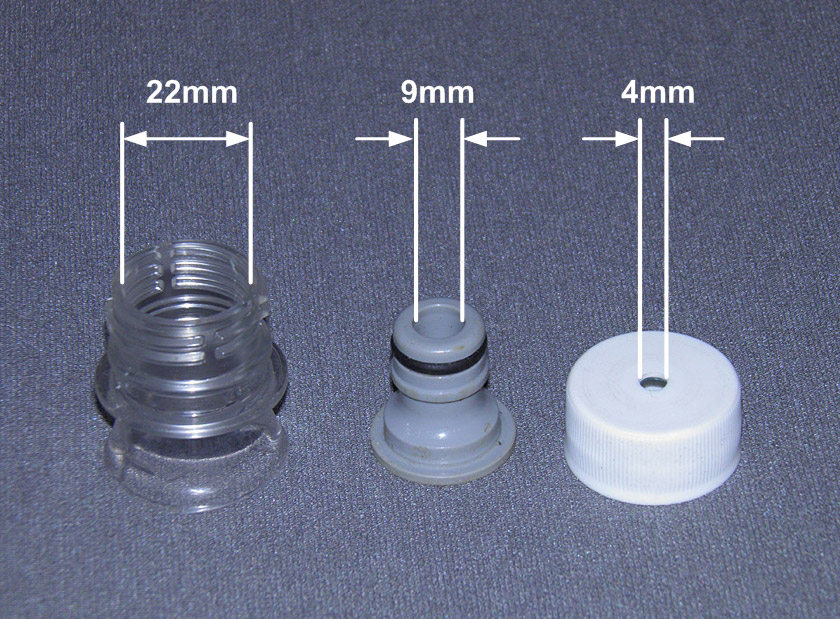
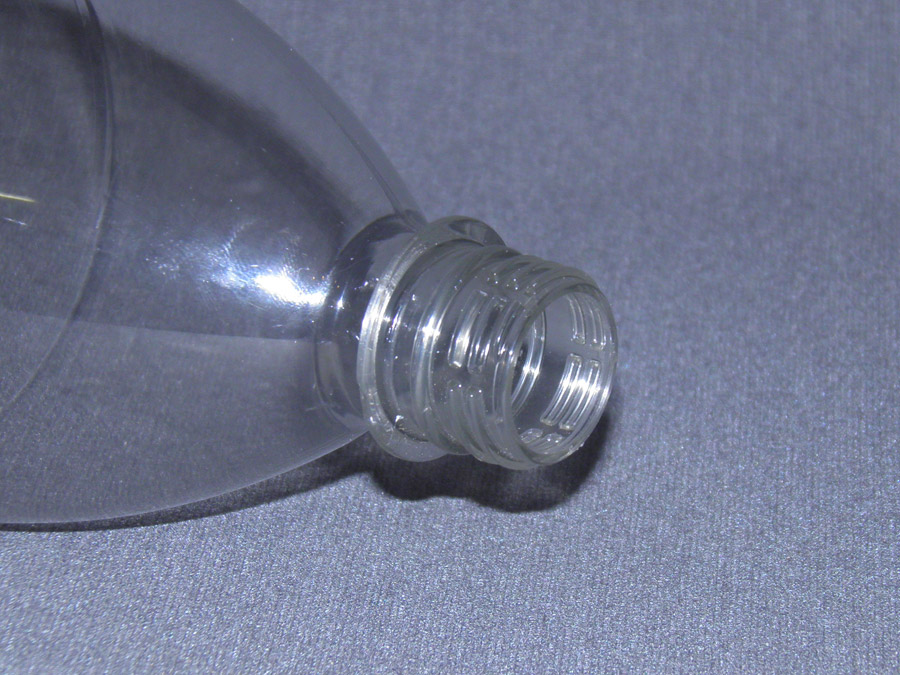
Full-bore |
This is the standard neck opening of a PET bottle used for
most water rockets.
The diameter is ~22mm. Sometimes these nozzles are
attached to other rockets such as those made from FTC. These are by far
the simplest nozzles to make and use.
|
 |
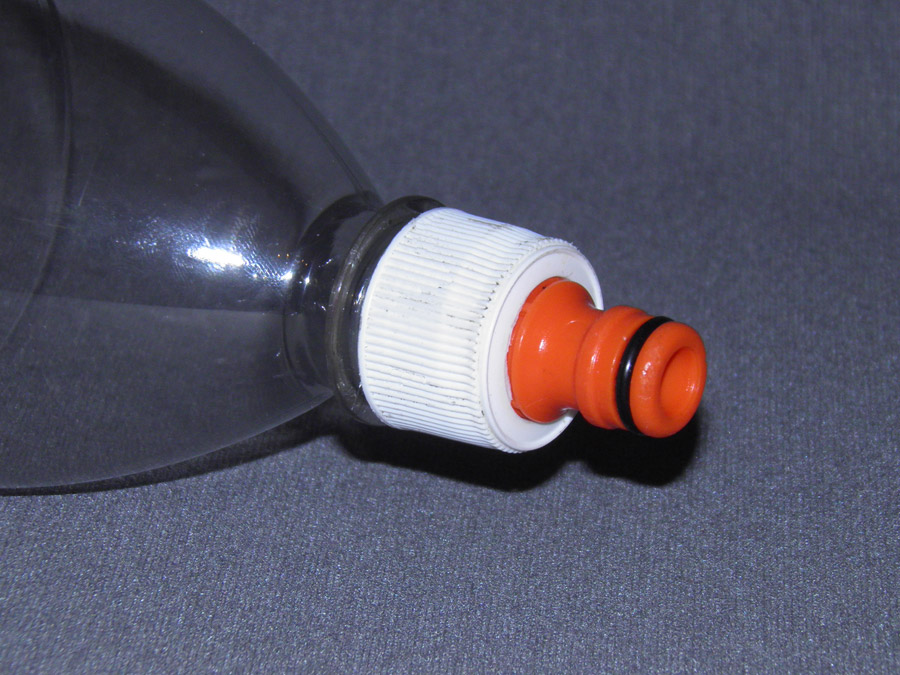
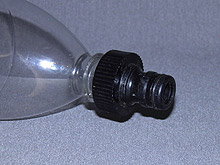
Gardena |
Gardena nozzles are made from garden hose quick connectors.
The garden industry typically refers to their measurement by their
external diameter of 12mm whereas the water rocket community refers to
the same quick connectors by their internal diameter of 9mm.
Normal tap
quick connector adaptors are unsuitable for use directly
on most PET bottles as the threads don't match. Some work is required to
make a Gardena nozzle.
See the Gardena
Nozzle tutorial for more details. |
 |
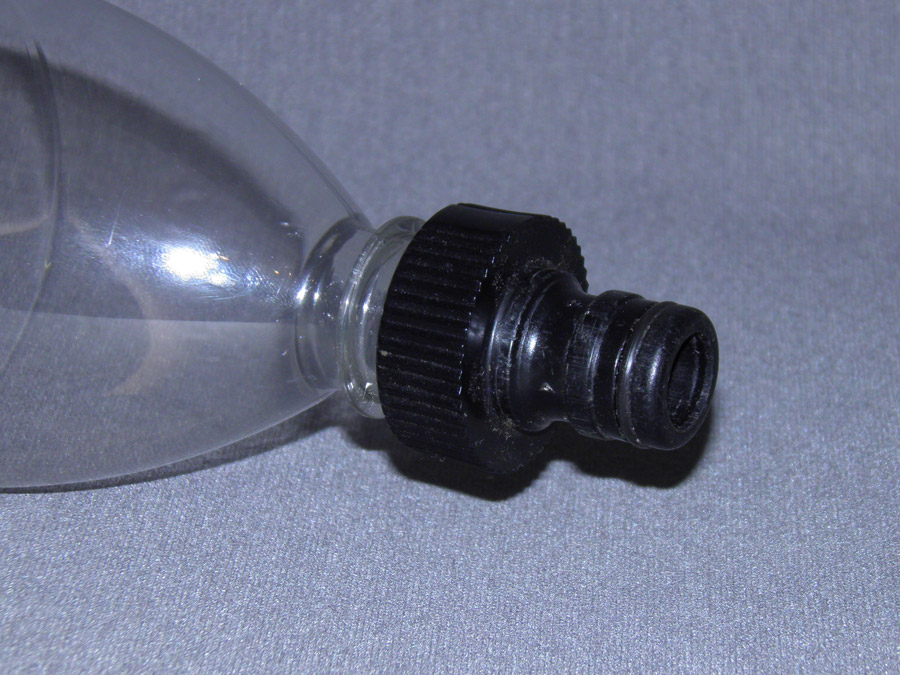
Maxi-Flo |
This nozzle is similar to the Gardena quick connector, but
with a larger diameter. The internal diameter is 15mm. The garden industry refers
to these again by their external diameter of 18mm.
|
 |
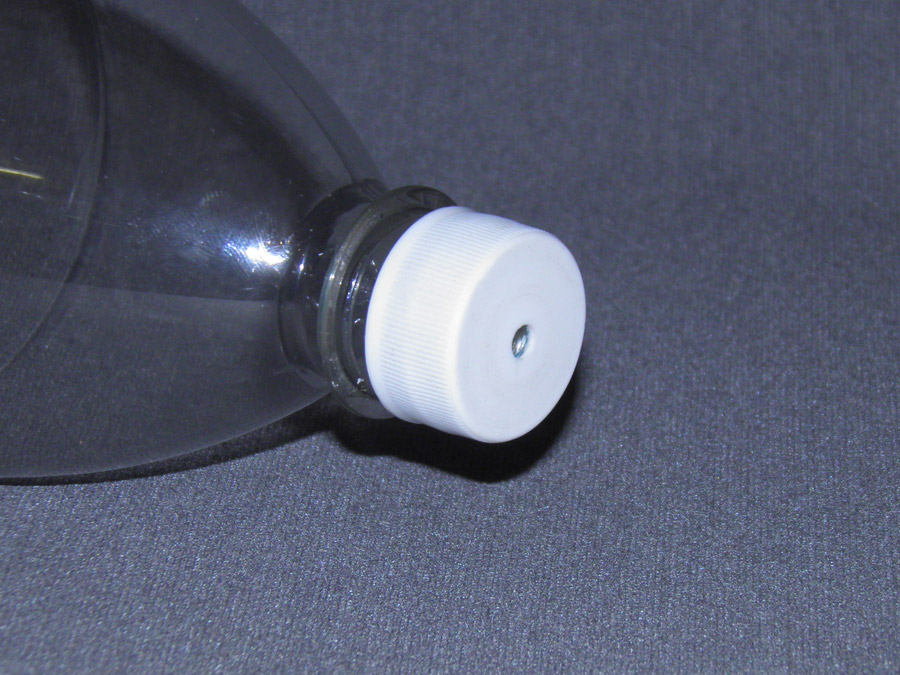
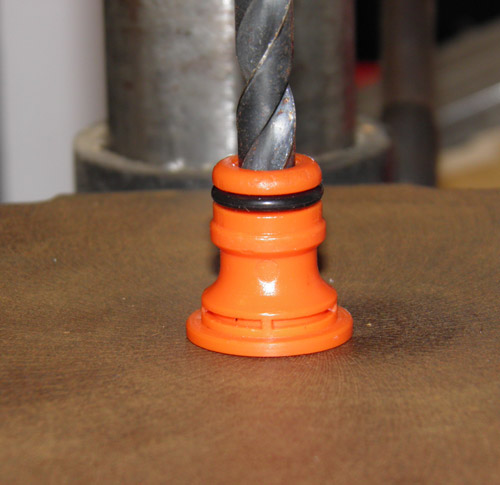
Cap |
This nozzle is simply a
standard bottle cap with a hole drilled in it. AntiGravity
Research uses these with their unique launcher.
|
 |
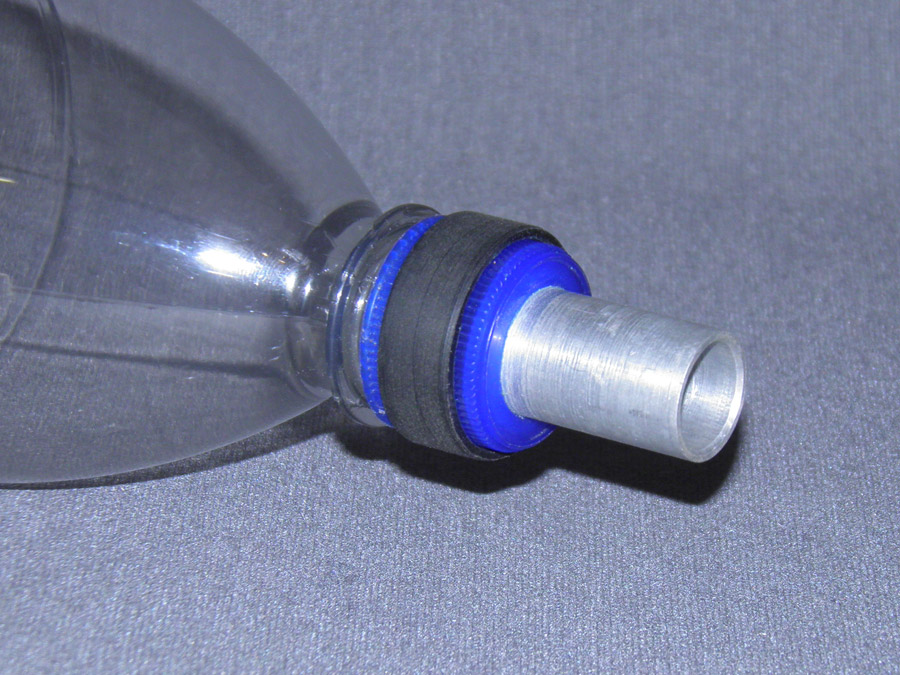
Sport-cap |
These nozzles are made from the cap on sports drinks.
These are not commonly in use.
The tutorial on how to make the sport cap nozzle is here:
|
 |
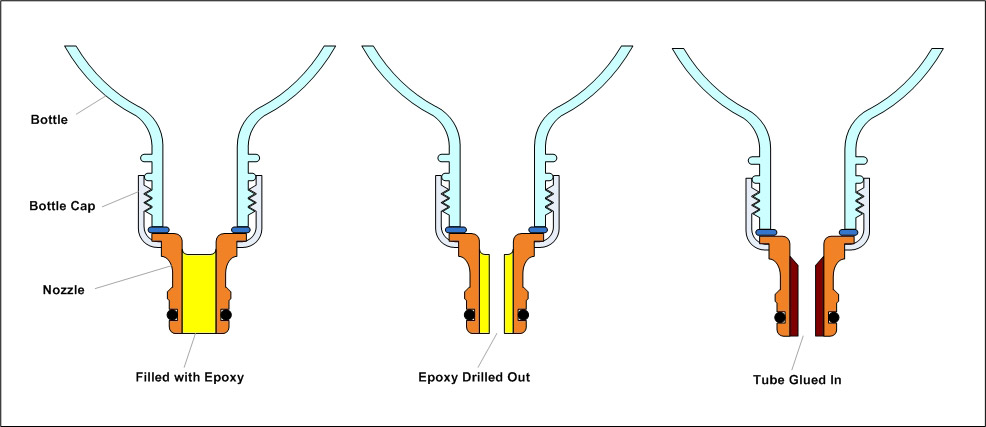
Custom |
Custom nozzles can be made from any material, any profile and
any size, however, these are less common and typically designed for
specific rockets and launchers. Here are some other examples of custom
nozzles:
|
 |
T-nozzle |
T-nozzles are a special nozzle that changes the internal
diameter. The nozzle has a larger diameter while it is on the launch
tube to maximize the piston effect, but once it leaves the launch tube
it reduces the diameter for a longer sustained burn. The T-Nozzles concept can be used
with various nozzles diameters.
Here are some examples of how to make t-nozzles:
|
Large Nozzles vs. Small Nozzles
Many people ask whether a larger or a smaller nozzle is better,
however, nozzle size must be chosen in combination with launch pressure
and lift-off weight. The rocket must achieve at least a minimum
acceleration to reach a high enough velocity by the time it leaves the
guide rail or launch tube so the fins can help stabilise the rocket.
For small light rockets you have a choice between small or large
nozzles, while for large or heavy rockets you typically need proportionally larger nozzles.
Regardless of nozzle size, accelerations well
below 3G are likely to result in the rocket tipping over soon after
launch especially during cross wind conditions. As a rule-of-thumb you
should try to aim for accelerations of 3G or higher for most launches.
You can use one of the on-line water rocket simulators
to calculate the predicted acceleration of your rocket for a given
nozzle size.
Once you determine that your rocket will achieve at least the minimum
acceleration with a particular nozzle, water fill and pressure, you then
often have a choice at how much faster you want the rocket to
accelerate.
While keeping the weight and launch pressure the same, you can change
the acceleration by changing the size of the nozzle. Small light rockets
with large nozzles can easily reach accelerations of 150G+. For Example:
A 2L rocket that weighs 150grams, uses a 22mm full-bore nozzle, filled
with 800mL of water and pressurised to 130psi will reach a maximum
acceleration of ~155G.
High and low accelerations have their advantages and disadvantages and which one you
choose depends on what you are trying to achieve.
| Acceleration |
Advantages |
Disadvantages |
| High |
- Allows your rocket to reach a stable speed sooner
reducing the need for longer guide rails.
- The rocket will generally reach a higher altitude but is
dependant on a number of factors.
- Generally the launcher
does not require a separate guide rail if a launch tube is used.
|
- More stress put on components. Components need to be
secured against the acceleration force,
- Aerodynamics becomes more important as
drag is proportional to the square of the velocity.
- Difficult to film
and photograph. The rocket moves very quickly during launch.
|
| Low |
- Less stress put on components during launch.
- Easy to film
and photograph
- Suitable for upper stages in multi-stage rockets to
keep peak velocity down.
|
- Generally need a guide rail on the launcher
- More susceptible to cross
wind during early part of flight
- Single stage rocket may not fly nearly as high as a high
acceleration rocket, but again that is dependant on a number
of factors.
|
Practical Tips
- Removable Nozzles - If you are adding a restricted nozzle to your rocket then it is a
good idea to make it removable. That way you can swap it between rockets
as needed and you can try flying the same rocket with different nozzles.
- Nozzle Weight - Keep your nozzle weight to a minimum. Using a
heavy nozzle not only means you will achieve lower altitude, but
will make your rocket less stable because it moves the center of
gravity further back down the rocket.
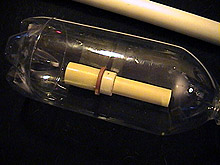
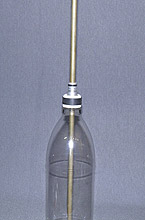
- Nozzle Alignment - Make sure your nozzle is well aligned. If
you are using a removable nozzle, or are gluing your nozzle
permanently, then it is important that you make sure your nozzle
directs the thrust down the centerline of your rocket and the thrust
vector goes through the rocket's center of gravity. If the nozzle is
misaligned you may end up with a rocket that flies in an arc rather
than straight up.
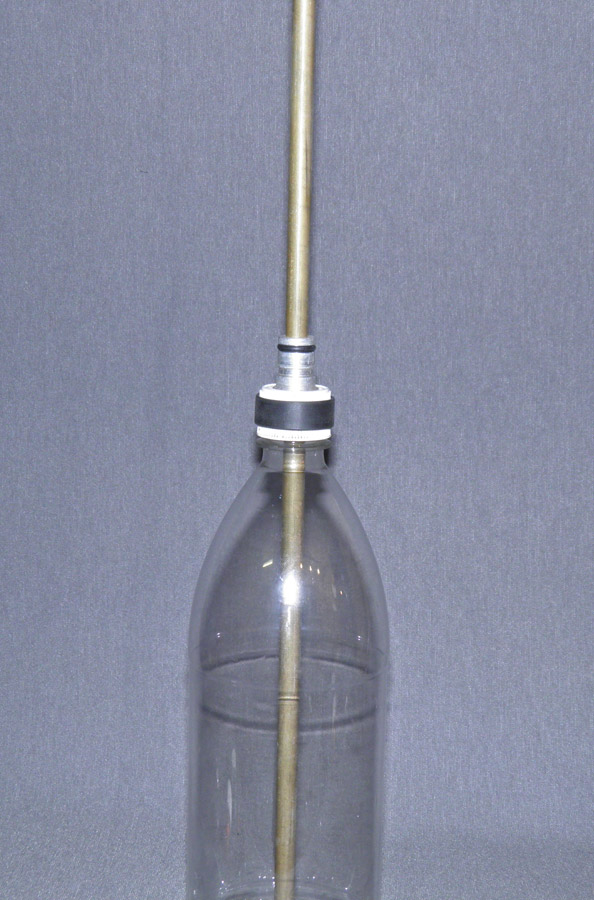
One way test your nozzle alignment is to get a long (~1m) dowel, rod
or tube that fits tightly into your nozzle. Stand the rocket up on
it's nosecone so the dowel is sticking up. This way the weight of
the dowel doesn't affect the nozzle. It should be fairly obvious if
the dowel is leaning to one side indicating the nozzle is
misaligned.
|