|
Filming water rockets can be useful for sharing your greatest
achievements in your favourite hobby, as well as providing a
valuable analysis tool for improving your rockets.
These tips are not supposed to be a comprehensive list of
steps in creating perfect videos. Rather it is a collection of
techniques we have found useful in the course of filming some
350+ water rocket launches with a standard digital video (DV)
camera.
Filming
- Bring a spare fully charged battery and at least one spare
video tape. If you forgot batteries, try to conserve power by
switching off the fold out screen and using the view finder.
If you forgot a spare tape and you only have a few minutes
left, you can switch to Long Play to get a few more minutes.
- Set your camera to fixed focus – This allows you to use
your zoom without the camera having to hunt for focus while
looking at a blue sky. Most camera’s auto-focus is based on
the camera detecting high contrast lines in the image and then
focusing the lens system until they are sharp. In the absence
of high contrast lines (blue sky) focus can be a real problem.
To prepare do the following:
a) Set your camera to focus lock (read your camera manual how
to do this)
b) Zoom in on an object perhaps 100 meters away
c) Manually adjust the focus so the image looks sharp (using
the large foldout screen is easier than the viewfinder)
d) Zoom back out and the camera is ready to shoot. The image
will still mostly be in focus unless you are too close to the
subject.
When the rocket is flying, you can zoom in and know that the
rocket will be roughly in good focus, even if it moves in and
out of frame.
- Use the zoom only when the rocket is descending under
parachute. It is very difficult to track the rocket in the
ascent stage while zoomed in.
- Start recording at least 20 seconds before the launch so
you can hear the count down, and observe any conditions around
the rocket should you need to later analyse what happened. The
video can always be edited later.
- After you press record, purposefully move your shutter
finger/thumb away from the record button and rest it somewhere
on the camera. This will prevent you from accidentally
pressing “stop record” when the rocket launches. This is quite
common problem if you often use a still camera where you need
to press the shutter button during launch. We have been caught
out by this a number of times until we started practicing this
technique.
- Point the camera such the rocket is in the bottom third of
the screen so that you can maximise the amount of the launch
you will see. If it is a fast launch there will be a certain
amount of lag between when the rocket takes off and you react
to track it.
- Don’t use the viewfinder or the foldout screen to aim the
camera after launch. We generally hold the camera at arms
length sighting down the top of the camera just pointing our
arm at the rocket as it flies. Since the camera is zoomed out
it has a reasonable field of view and almost always catches
the rocket. If you are looking through the viewfinder or at
the screen, and the rocket moves out of frame it is very
difficult to find it again specially at distance. As you hunt
around with the camera and look back and forth between the
screen and where the rocket is in the sky can make for very
shaky video that generally does a good job at filming only
sky.
When the rocket starts falling under parachute you can try to
use the foldout screen to track it and only then zoom in, but
use the zoom sparingly. Zoom out before the rocket hits the
ground so you can see the ground coming in the scene.
- Continue filming for a few seconds after the rocket lands
as some cameras may roll the tape back a little when you stop
recording. Keep filming especially if the rocket crashes into
something, and try to get peoples reactions. Again editing
software will be able to remove any excessively long scenes.
- Try to have the sun at your back. You may need to have a
guess at which way the rocket will go so that it doesn’t go
between you and the sun.
- Stand back between 5-15 meters from the launch pad. Too
close and the scene will be a blur, and you will get wet. The
lens is also likely to get water droplets on it. Stand too far
and little detail will be visible on the rocket. Having said
that, if you are doing multiple launches on the day, you can
try some long distance shots for variety. If the rocket is
predictable where it will land try to go to that general
location. (usually downwind from the launch pad) You may get a
really good shot as it descends on top of you or near you.
- If you also have a digital still camera you can often use
its movie capture capability to shoot reasonable video. These
are best set up on a tripod closer to the rocket for launch
detail, as the video quality tends to be worse than a normal
DV camera.
- Make sure that the person launching the rocket waits until
you are ready, as you may need to set your manual focus first.
- Try to capture other scenes other than just the launch.
Setting up the rocket, filling it with water, folding
parachutes etc. always makes the video more interesting.
- Think about who the video is for - most likely friends and
other water rocket enthusiasts. As a water rocket enthusiast
you should know what you would want to see in other peoples
videos – and film those things.
Inflight Filming
This topic is an evolving topic in water rockets as
technology becomes cheaper and smaller it is allowing people to
place cameras onboard rockets without too much worry about
braking them and loosing too much altitude due to the weight.
- Cameras come in two flavours: those that record footage on
board; and those that transmit it. Storing on board
typically means you are free from interference and the whole
set up is simple. If you loose the rocket you also loose the
footage. With transmitted video you can get a live view on
the ground and if you loose your rocket you at least have
the footage. With transmitted video you also essentially
have unlimited amount of recording time whereas on board
video can be limited. Resolution and amount of available
memory drives the price up.
- When you place your camera on the rocket try to place it
such that it will give you a good view of the ground. When you
point the camera sideways, try to angle it down slightly so
that most of the frame is taken up by the ground. This is
where most of the interesting things are and if the rocket
tips over backwards you are still likely to see some of the
ground.
- Attach your parachute in such a way that it still allows
the camera to point at the ground while it is descending.
- The other standard angle is pointing the camera almost
straight down so you can see the rocket body and fins. This
has the problem of having to place the camera in the air
stream and adding more drag. You can use a small mirror to
point at the ground while keeping your camera vertical.
- Try to film sideways on rockets with very little spin, and
downwards if they spin a lot.
- Be prepared that on every launch there is a possibility
that the camera will be smashed into a million little pieces
if the recovery system fails.
Editing
These are some suggestions for editing videos associated with
water rockets regardless of what editing program you use.
- Make sure you have plenty of hard drive space to do your
editing before you begin.
- Always add some kind of title screen including date. You
can do this as a standalone screen or as an overlay on the
video.
- It is always good to provide enough information for people
to know what is going on. You will find this useful weeks and
years later when you are reviewing the footage and want to
know the rockets parameters.
- You can also measure the total flight time in your video
editor as you can step from the very first frame of launch to
the first contact with the power lines … err I mean ground.
- When including text, make sure you leave it on long enough
for people to read. A simple way to know is preview it on
screen and see if you had enough time to read it – adjust
accordingly. Don’t leave it on too long though, the really
slow readers can always replay the video if they need to.
- Think about safe areas on screen. When video is displayed
back on a TV a certain amount of the frame is not shown (known
as over-scan). Don’t put text in that portion of the frame.
- Allow at least 5 seconds of video in a scene before the
action happens so people can get oriented as to what they are
watching. Also allow a few seconds at the end of the scene.
- Try to use minimal transition effects from scene to scene.
Only use an effect if it adds to the movie, not because the
software has it.
- As water rockets are fast moving objects, slow motion of
the scene is always interesting. Always add the realtime
footage first followed by the slow motion (does not have to be
from the same angle). Only include the most interesting part
of scene in the slow motion. How slow motion is set up depends
on your editing software.
Sound
It is a good idea to add music to your video as it helps to
link the entire movie together. (A good source of music is:
http://ccmixter.org/ )
- Try to pick a sound track that goes with the movie. Often
just playing the sound on a CD player while watching the
images will give you a good idea if it works with it or not.
- Before you start editing the video lay down your sound
track as you can match the scene events with events in the
music. You can easily align the launch with a prominent
transition in the music. This adds to the mood and continuity
of the video.
- If the video turns out to be shorter than the song, you
can always fade the music out before the end.
- Instrumental music is almost always a better choice over
vocals as it allows people to concentrate on the vision rather
than concentrate on the lyrics.
- After you finish editing the video portions you need to
edit the sound that was recorded while filming the video.
Generally you can use the volume envelope to cut out most of
the background noise and only leave the count down, launch
noise, crashes, screams and any clear commentary. When that is
done you may add any narration that you want to record with
the video.
- You can then adjust the music volume envelope to make the
narration to be heard clearer.
- Be ruthless with cutting things out, and keep only the
very best bits of video. It is always better to keep the
audience wanting more than having them be bored.
Slow Motion
Some new digital cameras allow you to film at up to 60 frames
per second which is useful for slow motion scenes. See if your
camera has this setting. Often the trade-off is a smaller video
frame such as 320 x 240. But for close up work this can be very
useful especially for static fire tests to see what is going on.
You can still achieve reasonable slow motion even if you do
not have a high speed camera. Read your editing software manual
on how to achieve slow motion. Experiment with the different
settings for frame interpolation and setting different rates.
Lighting
Make sure your scenes are always well lit. Filming in low
light tends to give more grainy images and auto-focus can be a
problem.
Whether filming static tests or real launches, make sure any
artificial light sources are protected from the water spray.
Don’t worry about the sun, the sun can protect itself from any
water splashes.
Filming a static test from multiple angles is great for later
analysis. Always make sure that the scene is well illuminated
for all the camera angles, and that there aren’t items in the
background that will interfere with the subject matter.
If you can help it, keep the background dark and dull.
Editing Software
Most editing software available today is good enough to
create very good movies. The one you choose will depend on your
budget, or what came with your camera. We use Sony Vegas + DVD
to edit our movies. It is very easy to use and has some powerful
features.
One tool that we find useful is
VirtualDub – a freeware tool
that can easily and quickly process videos. We use it to produce
a series of still images from the 60fps video sequences, and
then import those into Vegas. We also use it to enhance the
video with its built in filters.
Hardware
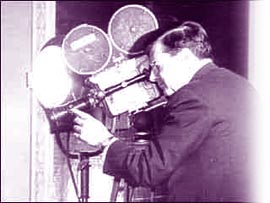
We use a small run-of-the-mill DV camera (JVC GR-D73A).
Almost any medium range will do though.
We also use a Cannon Powershot A540 still camera as well as
an Olympus digital camera for stills. The Cannon can shoot
decent video with sound and it offers the 60fps option but at
only 320 x 240 resolution. Otherwise it can film at 640 x 480 at
standard frame rates.
There are now affordable high frame rate cameras on the
market such as the Casio Exilim FC100. Other than being able to
film in HD it can also record at 210, 420 and 1000fps at smaller
resolutions.
For in-flight videos we use either a small inexpensive US$20 digital
camera (JB1) that records up to 30 seconds of 320 x 240 video at
around 15 frames per second. It has 8Mb of onboard storage. This
camera is now outdated and no longer sold. It runs from a single AAA battery.
Alternatively we also use the more recent FlyCamOne V2 camera
which will record for up to 30 minutes of 640 x 480 video.
A recent addition to our camera line up has been the small
Mini DV MD80 camera that records 640x480 video onto micro SD
card.
See Also
Dean Wheeler's video tips :
http://www.et.byu.edu:8080/~wheeler/benchtop/videotips.php
Thanks Gene for suggesting this topic to be added. |