|
Date: 22nd
November 2008
Location:
Workshop/Wentworthville
Conditions:
windy
Team Members at Event:
GK and PK
This weeks' update is a bit of a mixed bag
of different things we have been up to. Most
of the time spend over the last weeks had
been getting things ready for the NSWRA Open
day.
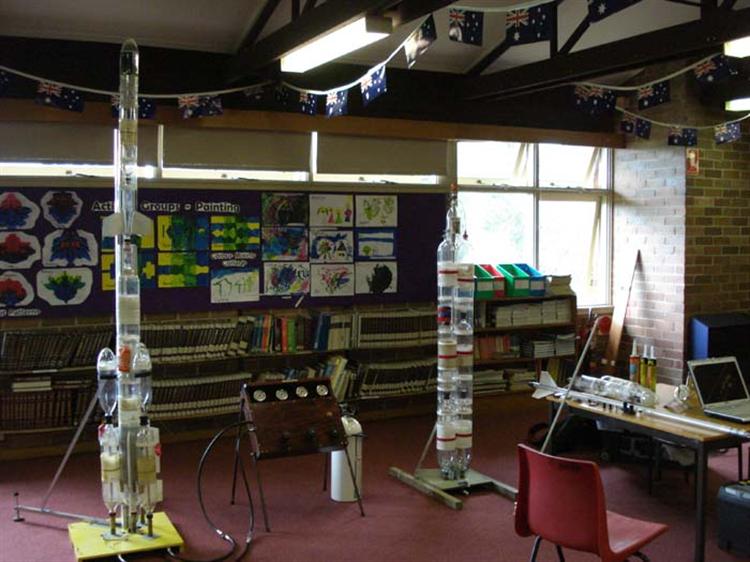
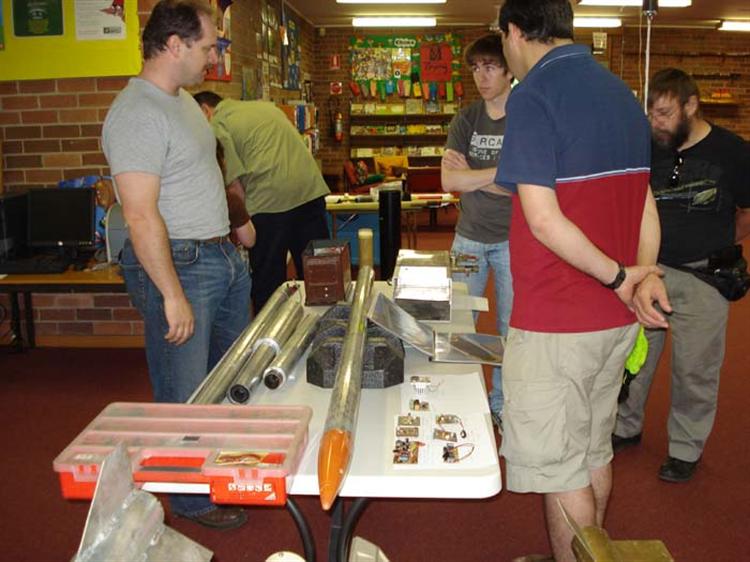
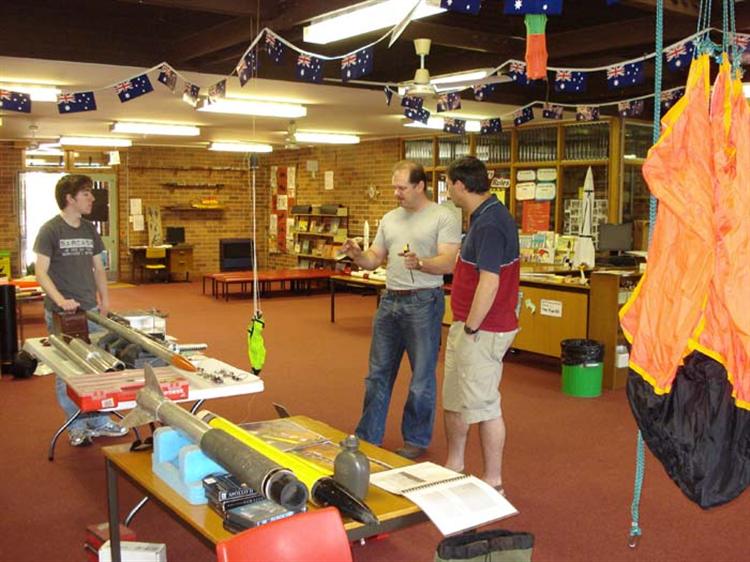
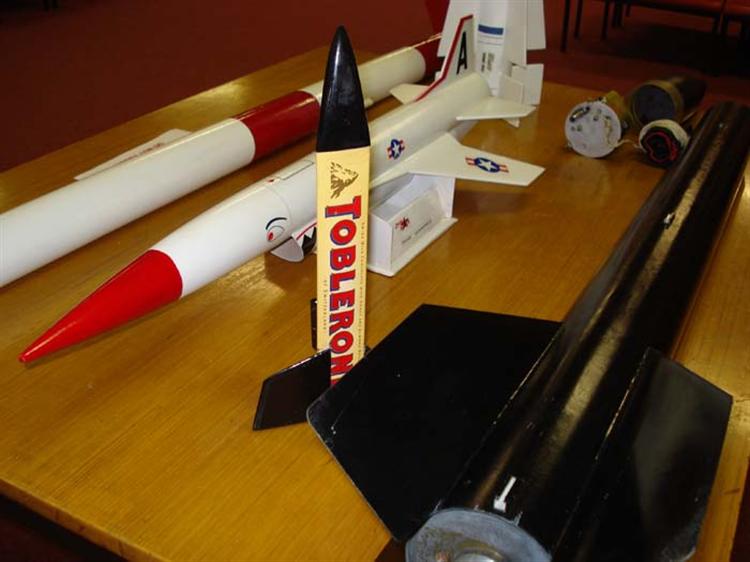
Open Day
The open day went quite well. Although there
were perhaps less people than I had expected
but it was actually better because we got a
chance to talk to the other rocketeers about
their projects. It was interesting to see
some of the high power hardware being
developed by ERG as well. Phil gave a good
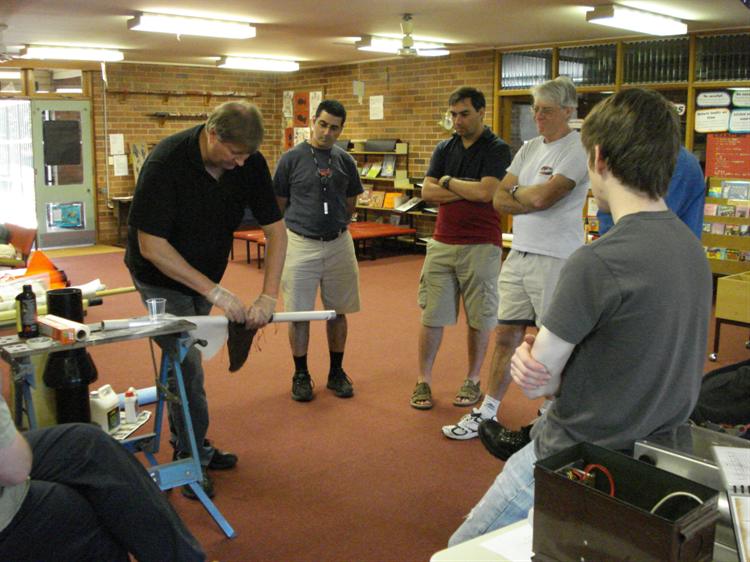
presentation on fiberglassing body tubes,
and after seeing some examples of the
strength and weight of the tubes, we've
decided to go to the next level of
construction and have a go ourselves at
making reinforced body tubes for our
rockets. The next day I went out and bought
a few things for the process. I'll be adding a
few more things to the Christmas wish list.
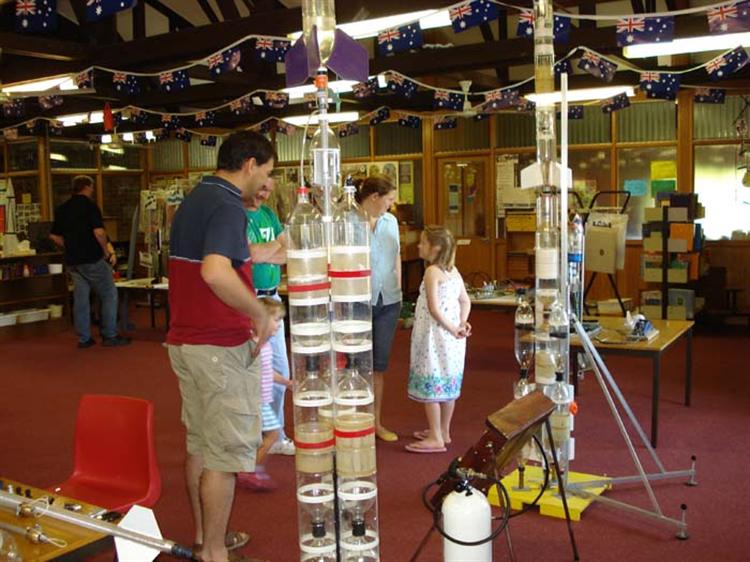
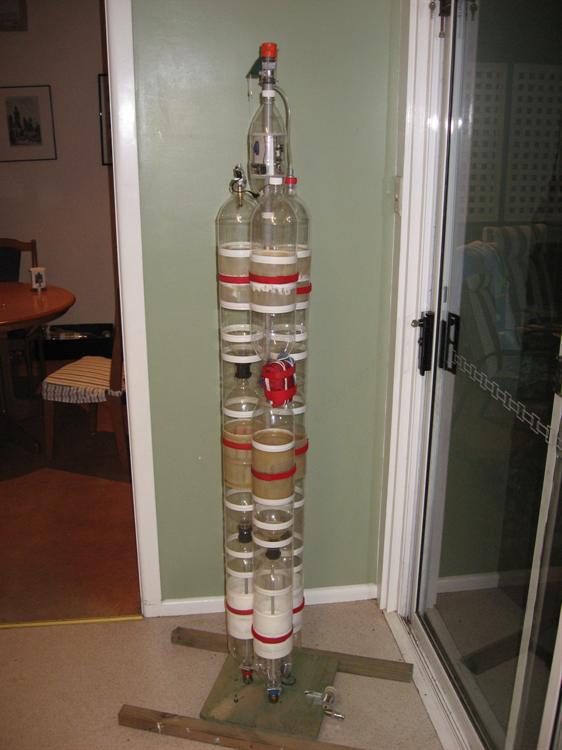
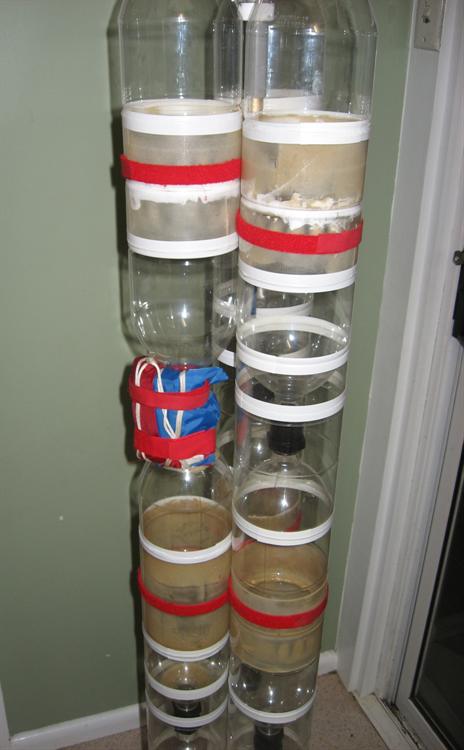
Acceleron V
We've started re-building the Acceleron
booster. Over the past couple of months
we've been collecting 2L bottles so that we
can splice them together. All up the booster
uses about 50 2L bottles to make up the
booster segments, transition sleeves and
neck reinforcing.
The booster is the biggest we have made to
date at ~33L. Previous versions of this
booster were 24L and 18L depending on the
bottle configuration used. Here each of the
three segments is made up of 3 spliced pairs
of 2L bottles tornado coupled together. At
130psi the pyro rocket equivalent is an
H310. (~250Ns total impulse) with 13mm
nozzles it is more like an H500.
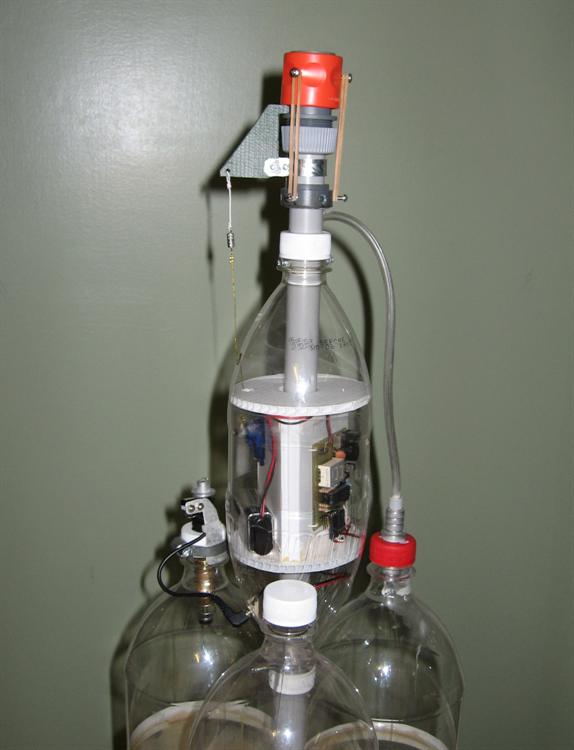
The staging mechanism pod is similar to what
was done on the previous versions of the
booster. The big difference is that it is
now smaller and lighter and no longer
contains the parachute. The parachute is now
stored in the space between two bottles of
one of the segments. The parachute is
released using the piano hinge mechanism
that has worked well for us on a number of our
other boosters.
The TDD pressure switch has been reused and the
V1.4 FC has been replaced with V1.5 and
configured for booster operations.
There are still quite a few things to do on
this booster such as attaching fins,
reinforcing more bottle necks, attaching the
sustainer support sleeve and pressure
testing all the bottles.
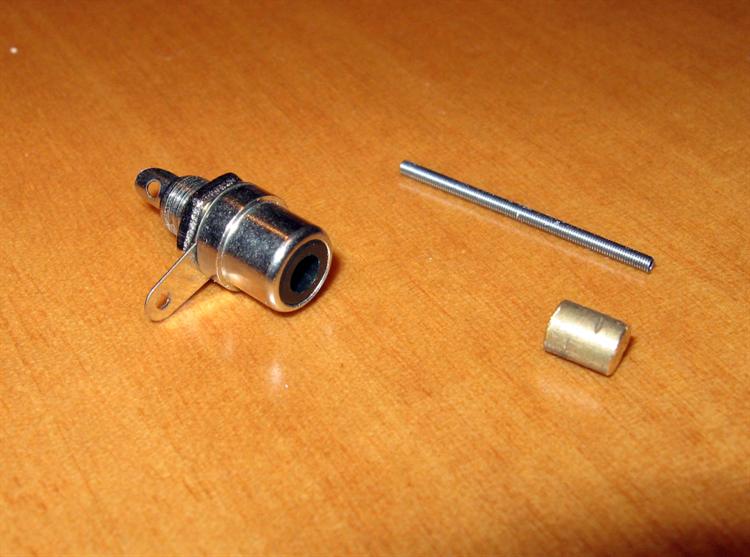
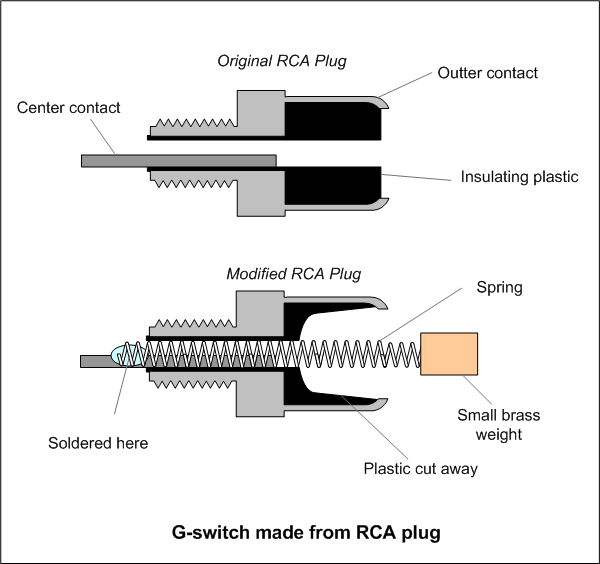
Simple G-switch
The flight computers/timers we use usually
need to be triggered on launch. Over the
last couple of years we have tried different
ways of building G-switches some worked
better than others. So we are adding another
one to the design mix. The main reason that
we are building our own is that commercial
G-switches are around $9. As we ramp up
production of FC V1.6 we wanted to be able
to bring down the cost of the whole unit.
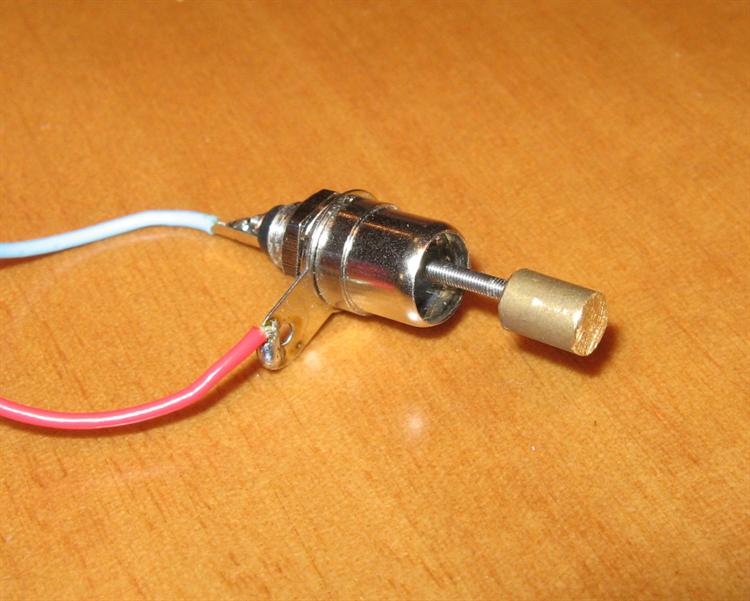
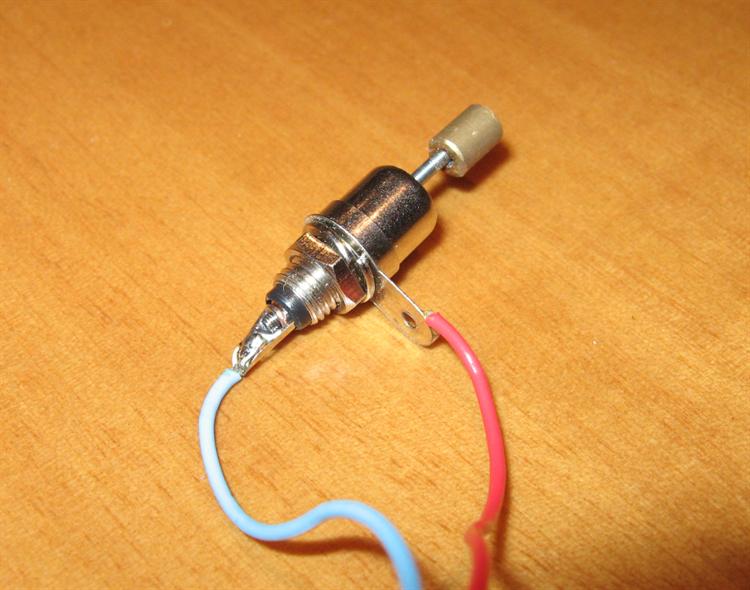
This version of the G-switch is made from a
50 cent female RCA plug bought from the
local electronics store. We drill out the
insulating plastic with a Dremmel tool and
thread a thin extension spring through the
hole and solder it to the center contact. We
then solder a small brass weight to the
other end of the
spring and the G-switch is finished. The RCA
plug conveniently gives us the electrical
insulation between the two contacts, the
solder lugs for the electrical connections,
as well as providing a good mechanical
mounting point. Because the outer contact is
circular, it does not matter which way the
G-switch is attached as long as it is
horizontal.
The G-switch is tuneable by changing the
brass weight, or spring
length.
Flight Computer V1.6 Progress
We've now received all of the components to
build 20 of the V1.6 flight computers. I'm
hoping to finish the PCB shortly and will
send it
away to have it manufactured. I've been
using a new version of Eagle to design the
PCB. It took a little time to get up to
speed with it and create some custom
components, but overall it is a very
powerful tool. I like its schematic / PCB
layout interaction that basically lets me
design the circuit diagram and it maps the
nets to the components layout. A quick run
of the auto router then generates the double
sided tracks with vias. Nice and easy.
The software for the flight computer is
mostly finished and has had the user
interface simplified. I have replaced the
multiplier, offset & delay parameters that
were a little harder to interpret by the
casual user with direct time setting ranging
from 0.1s to 99.9 seconds in steps of 0.1
seconds.
The time can only now be set in the
configure mode, meaning that when the
computer is turned on, a single button press
will arm it. Again simplifying the user
interaction with the flight computer.
I may add an option to be able to
switch the servo motor timing from 1 - 2ms to 0.5 - 2.5ms as some
servo motors need this timing to get full
range of motion. So much for standardisation
by manufacturers. This request actually came
in from the Oberon WR team after they built
a version of 1.5 and found that their 180
degree servo did not quite get the full
range of motion that it should have. We were
able to replicate this issue with one of our
cheaper 180 degree servos.
We are just hoping for some nice weather
this weekend so we can do some launching.
|