Each flight log entry usually
represents a launch or test day, and describes the
events that took place.
Click on an image to view a larger image, and
click the
browser's BACK button to return back to the
page.
Day 81 - Bits and pieces
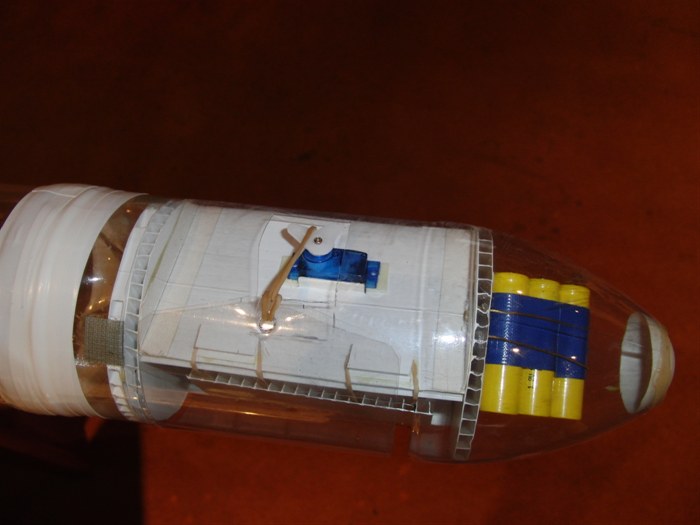
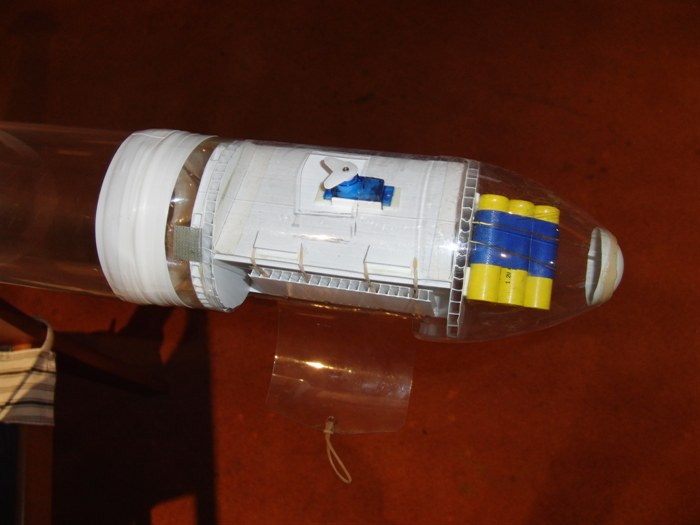
Servo holding parachute door closed.
Servo turns to release rubber band and door.
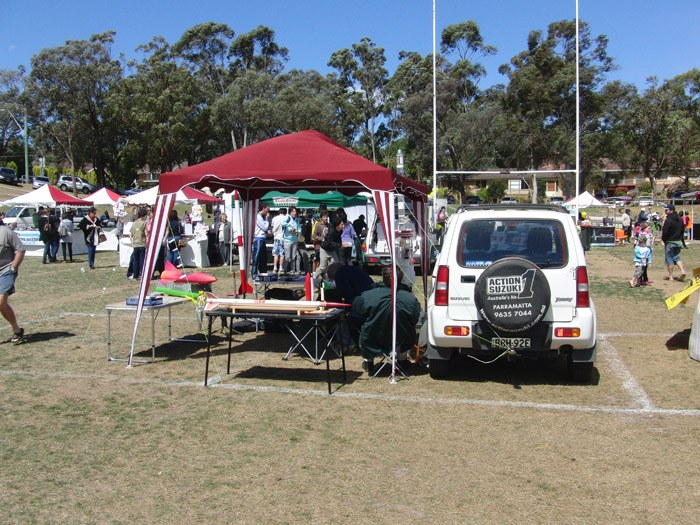
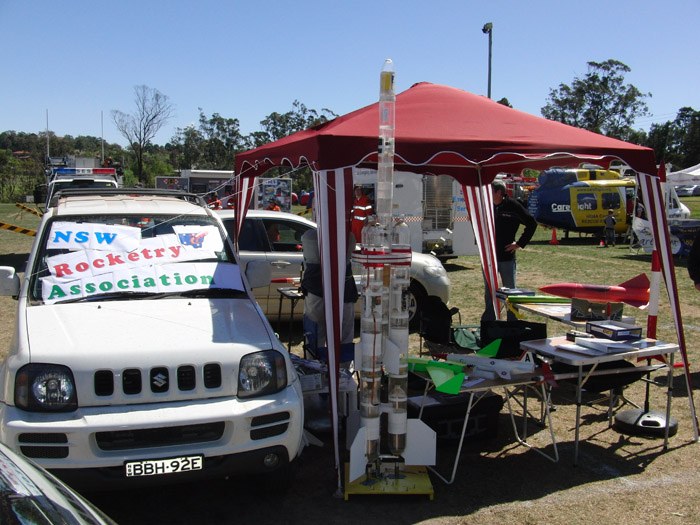
NSWRA at Crestwood fair.
Acceleron V and everything had to be tied
down in the strong wind.
It was a fun day talking rockets.
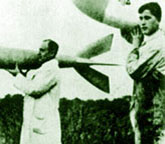
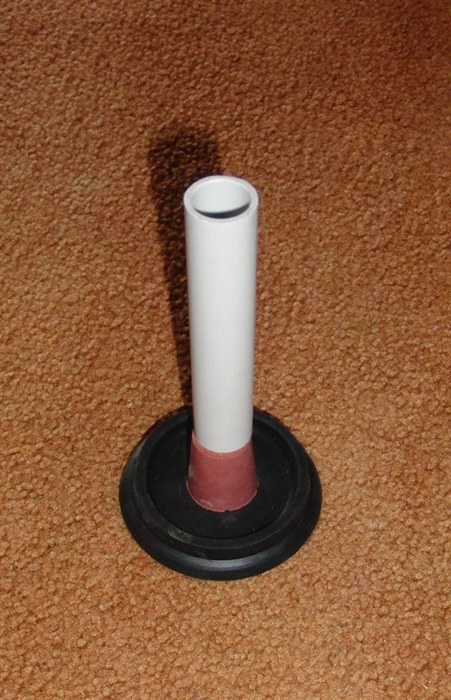
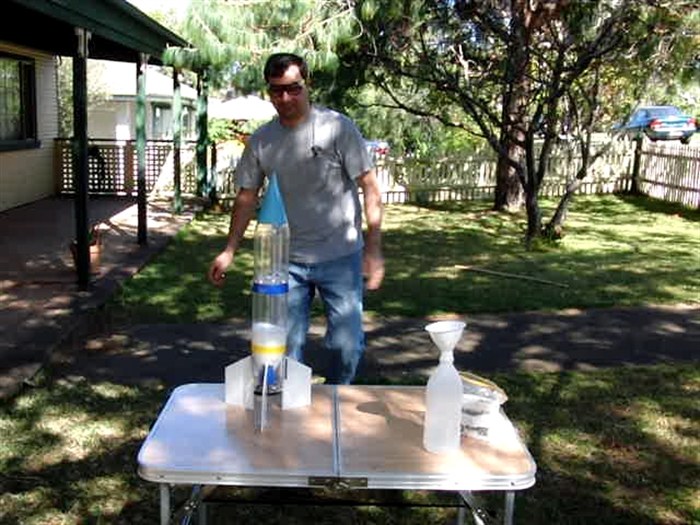
Beauty and the Geek bi-carb soda launcher
evaluation prototype. A piece of PVC pipe on a
No.10 rubber stopper screwed to a rubber foot.
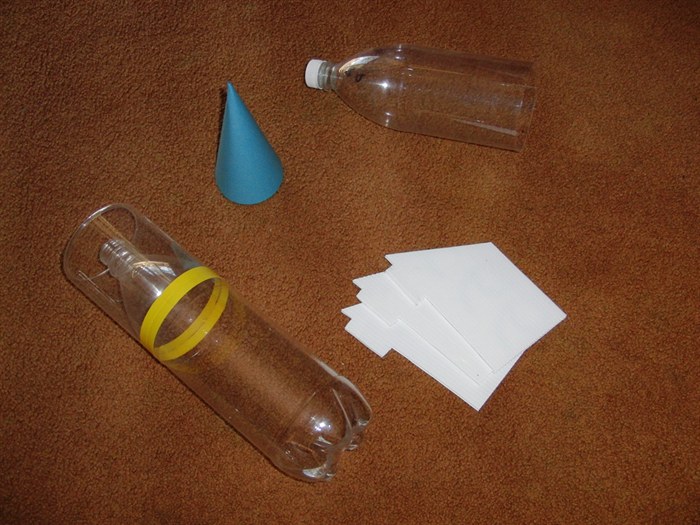
Beauty and the Geek evaluation prototype
rocket components.
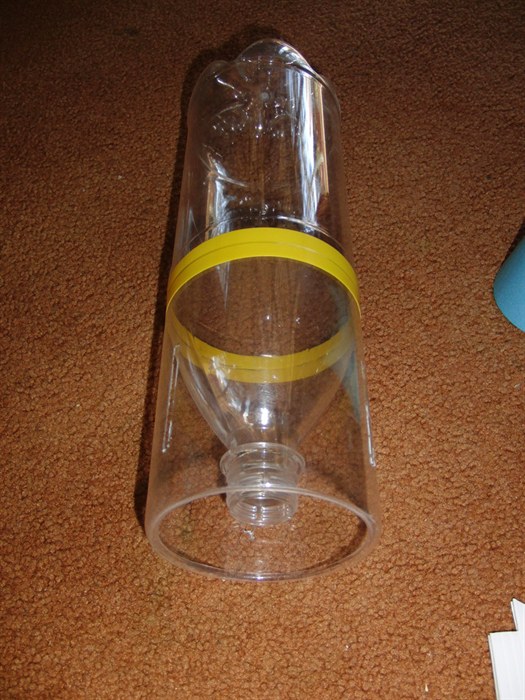
Detail of the slotted fin skirt to make it
easy to fit the fins and support the weight of
the rocket.
Screen shot from the prototype assembly
video.
Ready to launch. Paper nosecone and
coriflute fins.
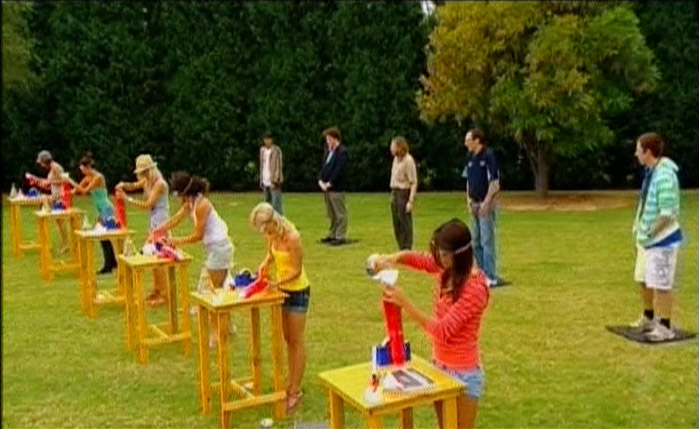
Screen shot from the show of the contestants
assembling their rockets.
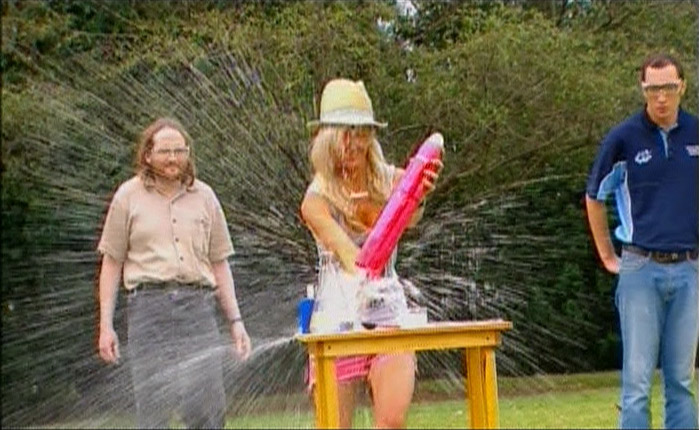
Not all rockets went exactly according to
plan.
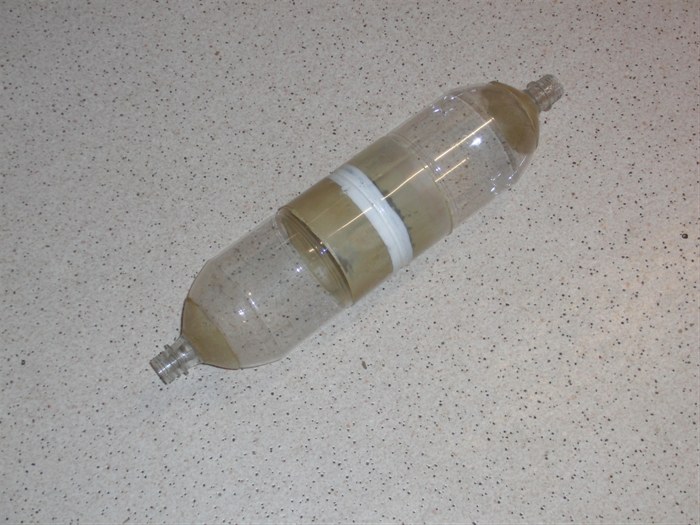
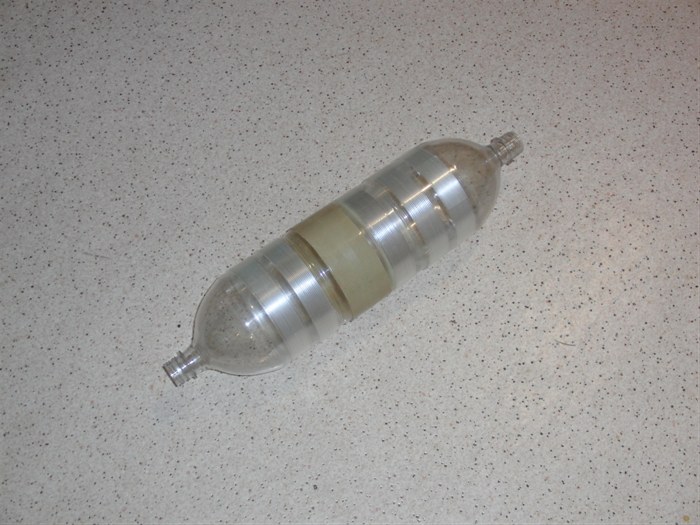
Our existing 2L splice-pairs with
reinforcing rings and two glues used in the
splice.
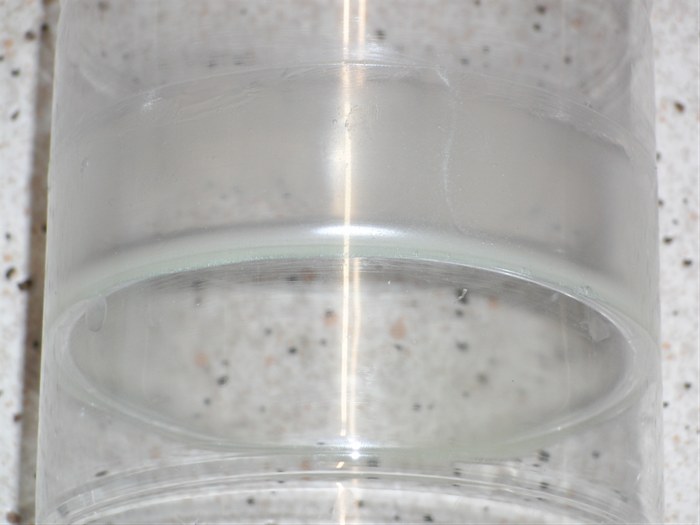
New splice test. Here the overlap is held
together with Araldite epoxy.
Detail of the overlap. The glue flows well
into the join.
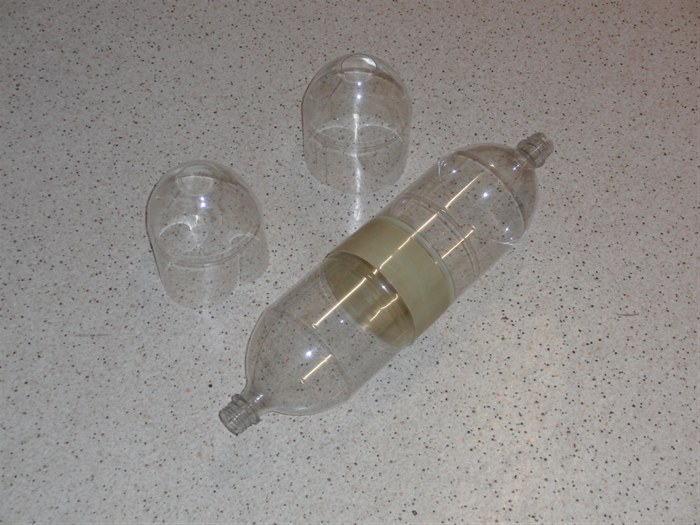
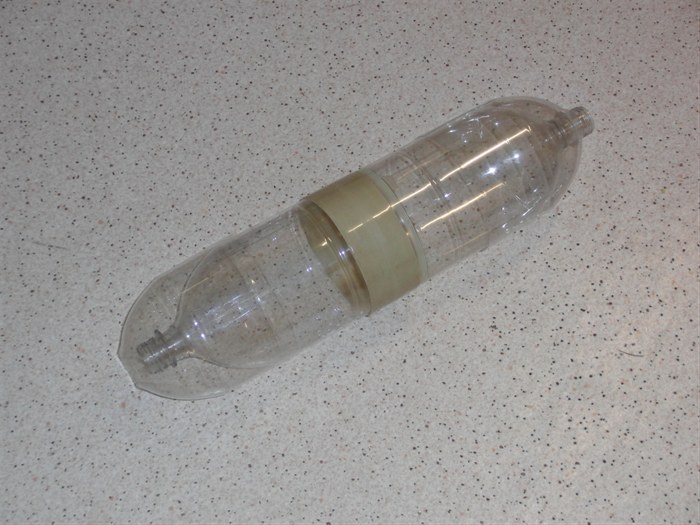
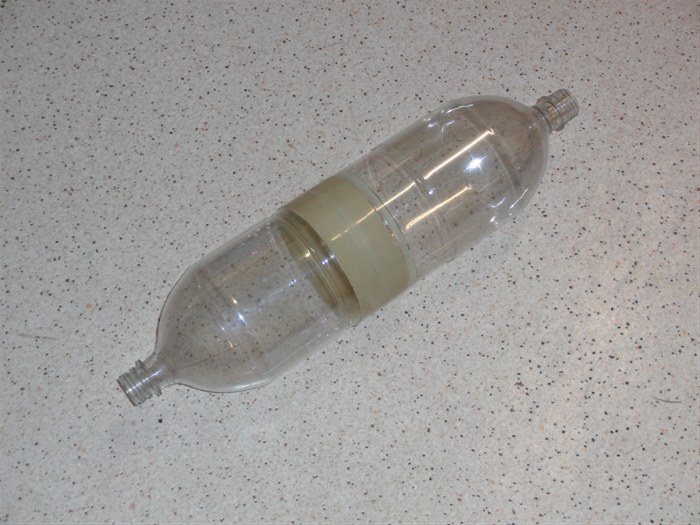
Here is the same splice with an additional
sleeve attached with PL Premium. The two shells
are now used to reinforce the necks.
Sliding the shells over the necks.
The splits in the shells allow the shells to
expand over the bottles.
The shells are held down with fiberglass
strapping tape.
Date:22nd
October 2009
Location:All over the place.
Conditions:Pleasant
Team Members at Events:GK and PK
We haven't done any
flights since the last update mostly due to
catching up on non-rocket related
activities. Development progress has,
however, been continuing on a number of
different projects which I'll discuss below.
It's a bit of a long write-up so you may
want to skip some sections.
We have made a slight improvement in the
side deployment mechanism we use by
eliminating of the door's pin, string and
latch. The servo horn now directly holds a
rubber band attached to the door. When it is
time to open the parachute door, the servo
simply releases the rubber band.
Advantages
Much simpler construction -
Eliminates the need to make the matching
latch components, the pin, and tying the
string to the correct length. This saves
on construction time.
Eliminates a metal component - the
pin.
A smaller servo can be used as there
is no force required to overcome the
frictional forces when pulling the pin.
Disadvantages
Uses a rubber band which can
deteriorate over time and may need to be
replaced.
Slightly less secure door. The pin
and latch made the door sit better
against the bottle, but a stronger
rubber band can be used.
We have been using this technique on the
Acceleron V booster to release the primary
and secondary parachutes, but have now
started using this technique on all new
rocket deployment mechanisms.
The servo horn "V"
configuration ensures the rubber band can't
slip over the servo's axel and prevent it
from releasing.
Crestwood Fair
Last month I spent a whole day
helping to man NSW Rocketry Association's
stall at the Crestwood fair. David and
Neville did a great job of organizing the
stall and getting all the display materials
together. We had all sorts of rockets on
display, and I even brought along a couple
of water rockets including the Acceleron V
to sit in the corner. It was a fun day
talking with people about rockets both water
and pyro.
Quite a few interested people stopped by
for a chat. We gave out close to 50 fliers
on the day, so we'll see how many people
turn up to the Doonside launches.
The worst part of the day was the strong
wind. We had to tie everything down, and
rockets on display had to be pointed into
the wind. I saw two other tents go
flying at the fair.
Beauty and The Geek
- Australia - TV Show
During the last month I had an
interesting opportunity to help out in one
of the challenges on Channel 7's
Beauty and the Geek Australia. The
challenge for the 'beauties' was to build a
simple rocket and launch it. The first to
launch it over a rope suspended about 5
meters above them would win the challenge.
The rocket challenge was shown in Episode 3.
(22nd October 2009).
The task producer had contacted me
several weeks before the challenge about
providing assistance with the rockets and so I met with him,
another producer, and their safety guy at
North Sydney oval. We discussed what options
there were for the challenge in terms of rockets and what to expect. We spent about
two hours discussing and testing a couple of
different prototypes I made for them
including a water rocket and at their
request a vinegar/bi-carb
soda (baking soda) rocket and launcher. We had the tables
and rope set up as well at the park. We used
a couple of the water rocket launchers from Jaycar to test the water rockets.
The requirements for the challenge were
quite different to what we are normally used
to. Unfortunately the challenge was more
about entertainment for the viewer rather
than about rocketry. The show's requirements
were such that the rocket build had to
happen within 3-5 minutes and the
contestants had to be standing next to the
rocket when it went off. The altitude the
rocket had to reach was only about 5m.
The build length was short because they
wanted to capture the rushed competitiveness
between the contestants to make it more
dramatic rather then allowing them say an
hour to build it and then edit the footage
down to the required time.
The producers also indicated that they
did not necessarily need the rocket launches to be
100% reliable to add to the excitement of
the challenge. With the water rockets using
commercial launchers, it was pretty much a
certainty that once the rocket was loaded
into the launcher that it would be capable
of launching over the rope. The fast
reacting bi-carb soda/vinegar combination
was a little more unpredictable as to when
it would launch and so they went with that.
About 10 days prior to the challenge I
attended the rehearsal on location, but
after a couple of hours waiting for the rain
to stop we called it a day. So instead I
made a video for them of a prototype being
built and launched so they could get an idea
of the entire process:
The rockets
Initially they had asked if I could build
them the rocket kits, but in the end they
bought about 15 rocket & launcher kits from the US.
I am glad they did because it would have
been a lot of work to get them all made in
time, and would have been more expensive. The rockets they
got were pretty simple,
consisting of a 1L bottle, two moulded
plastic sides with adhesive strips and a
rounded Styrofoam nose. The fins were made
of thin balsa wood and simply slotted into
the moulded plastic sides.
The launcher consisted of a tube,
attached to a rubber stopper and the stopper
was attached to a small foot that would keep
it upright. You fill the tube with bi-carb
soda, and the rocket with vinegar. You then
insert the tube and jam it all the way in up
to the stopper, shake and stand the rocket
up on its fins. When enough pressure builds
the stopper and tube is ejected and the
rocket flies off.
The Challenge
I attended on the day of the challenge in
a safety guy / technical advisory role.
On the day of the shoot I discussed with
the task producer some of the possible
safety issues there would be with the
rockets they purchased such as the thin and
weak balsa fins the rocket had to stand up
on and the possibility of the rockets
tipping over. The fins were simply pushed
into pretty flimsy slots on the rocket. This
ended up by far the biggest problem with
these rockets.
A brief assembly demo was given by the
task producer to the contestants prior to
start of the challenge. I made sure he
mentioned the possible safety issues. They did not want the
contestants to spend too much time asking
assembly questions to make the challenge a
bit more ... you know ... challenging. The contestants had a full set of
instructions on the table and were given a
minute to read them before starting.
Also prior to the start of the actual
challenge, both the task producer and their
safety guy made the contestants individually
aware of pointing the rockets straight up
and not at any other contestants.
Because of their proximity to the
launching rockets they all wore safety goggles, and even
the other contestants standing 3 meters
behind them had safety goggles. Some members
of the film crew also wore safety glasses.
I was given permission to step in in case I perceived there was
a potential problem or diffuse a rocket that
might be pressurised but did not launch.
The contestants were also made aware of this
and were told to ask me if they thought
there was a problem with their rocket.
The challenge was actually legitimate and
the girl who won managed to get the rocket
over the rope first. (max altitude was about
6 or 7 meters) The sequence was then re-shot
several times to get different camera angles
and close ups of the contestants making the
rockets. At one stage the winners' table was
replaced with a glass topped table with a
camera guy underneath, and the rocket was
set up and launched again by the winner.
All in all, it was a fun day and pretty
interesting to see how a reality TV segment
that takes 10 minutes of the show take about
5 hours to shoot.
In the end, it was good that they went
with the low power of bi-carb soda and
vinegar considering there were a lot of
people (~40) standing around including cast
and crew, and the rockets weren't always
pointing vertically when they went off.
They did pay me for my time and
materials, so now we can spend it on more rockets
of course. :)
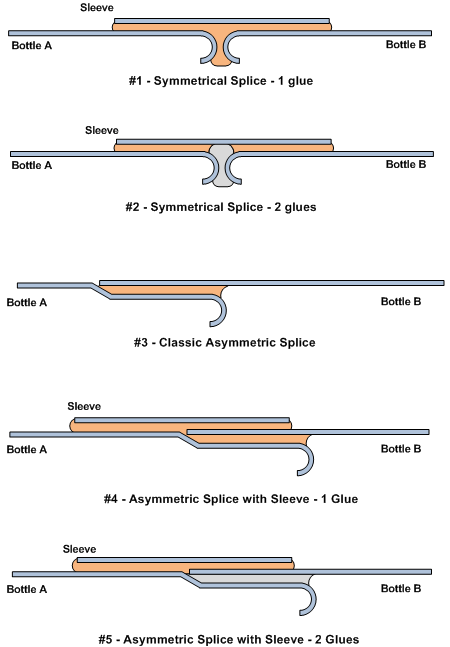
New Splice Testing
This week we have been investigating
ways of improving the way we make our
splices. We have been using the same
symmetrical splice technique (#1 in Figure
1. below) on our 2L bottles for a couple of years
now, but I have never been quite happy with
it. We have had quite a few failures along
the way, and the no-leak yield hasn't been
as high as we would like. This meant a lot
of wasted bottles and wasted time. The other
issue has been the relatively low pressure
the spliced pairs could hold. 130psi has
been the limit we could practically push
them to.
Figure 1. Splice
variations
We have been using PL premium almost
exclusively for our splices, but due to its
porosity leaks were common. To try to stop
the leaks we have been using a different
but weaker glue (Sikaflex 11FC) to do the sealing in
the joint and PL to hold the splice together
but this made the assembly more complicated
and we still ended up with leaks although
less often. (Splice #2 in Fig. 1.)
We used to use 2.25L bottles as the
sleeve since they fit well over the 2L
bottles and no shrinking was required. But
recently we have found that some of the
2.25L bottles don't fit as well anymore.
So we decided to explore what other
options we had in terms of splicing
techniques.
Now that we have a reliable process for
shrinking the bottle down to the right
diameter to fit into another bottle (as
opposed to shrinking the sleeve to fit) we
are revisiting the classic asymmetric splice
(#3).
The main reason for this approach is to
take advantage of the tighter fit where the
bottles meet each other at the edge of the
shrink region. This is where the two bottles
have the same diameter. Compare this against
the relatively uneven join between the
curled edges in a symmetrical splice.
Because we are inserting one bottle into
another we are reducing the internal volume
compared to the symmetrical splice, so the
smaller the overlap the better. If the
overlap is too small then there isn't enough
glue to hold the splice together at higher
pressures.
To help overcome this problem we are
adding an external sleeve to help hold the
splice together. The overlap then only needs
to be about half the amount if the sleeve is
gripping the outside of the bottle by the
same amount. (#4)
We are using a split sleeve since it
would be very difficult to slide a sleeve
over the bottles of the spliced pair. The
sleeve does not necessarily need to seal
well since the seal is provided by the
overlap. A small section of another sleeve
can be used to overlap the split in the
sleeve to provide better sleeve strength.
Some other improvements over what we have been
doing up to this point:
Neck Reinforcing
We have previously reinforced the necks
of the spliced-pair with rings made out of
other bottles, but it only strengthened the
necks not the rest of the bottle. This time
we are using Richard Wayman's
bottle-on-bottle (jacketing) technique to not only
strengthen the neck but also a significant
portion of the rest of the bottle. The
jacket is not held down by glue but rather a couple
of wraps of the fibreglass strapping tape.
This allows them to be removed and used on
other bottles should the splice leak.
Bottle Type
We are now using a single type of bottle
for the entire spliced pair. This makes it
much easier to apply this technique to
different types of bottles, and you are not
required to find a well matching sleeve
diameter from another bottle.
Bottle Count
Our previous spliced-pairs, used 5
bottles each. 2 for the main bottles, 1 for
the sleeve, and 2 for the neck
reinforcements. The new spliced pairs are
only made from 4 bottles. The sleeve is made
from sections of the 2 reinforcing bottles.
Reusability
With the reinforcing bottles
now no longer glued to the main bottles,
they can be reused on other spliced pairs if
the splice leaks. We used to throw away the
whole spliced-pair if a leak developed as
they are very difficult to fix.
Also if the splice leaks,
the main bottles can be converted to
reinforcing bottles for later use. This
saves a significant amount of bottles when
making up a lot of spliced-pairs for clustered
rockets.
There are of course a whole range of
other splice variants that may be worthwhile
exploring if these tests aren't successful.
I've only covered the ones we have been
experimenting with.
Tests
So far we have tested splice #4 with only
PL premium. Although the splice held well, a
small leak developed at 130 psi and so the
test was aborted. This was a little
disappointing, but the reinforcing held well
and there were no visible stress marks on
the bottles. The spliced-pair had a 3.15L
capacity and weighed 139 grams. The leak may
have also occurred due to insufficient cure
time. I left it only for 4 days to cure.
A second splice has been prepared based
on splice #5, using Araldite Super Strength
epoxy in the overlap to provide the seal and
PL for the sleeve. We are giving this splice
a full week to cure before testing.
If this test also fails, then we will try
a more flexible glue like the sikaflex in
the overlap for the seal.
Miscellaneous
The new workshop construction is going
really well. All the walls and ceiling are
up and it is about half painted. We still
need to make a door and then fit-out the
workshop.
This has taken up a lot of our free time.
The new website extension is also coming
along well. There is just a lot of typing to
do and I'm already a couple of weeks behind
where I would like to have been by now. I
don't want to publish it before it is ready
as I really dislike "Under Construction"
websites.