Each flight log entry usually
represents a launch or test day, and describes the
events that took place.
Click on an image to view a larger image, and
click the
browser's BACK button to return back to the
page.
Day 93 - Polaron G1, Parachute Cam and Tornado
Tubes
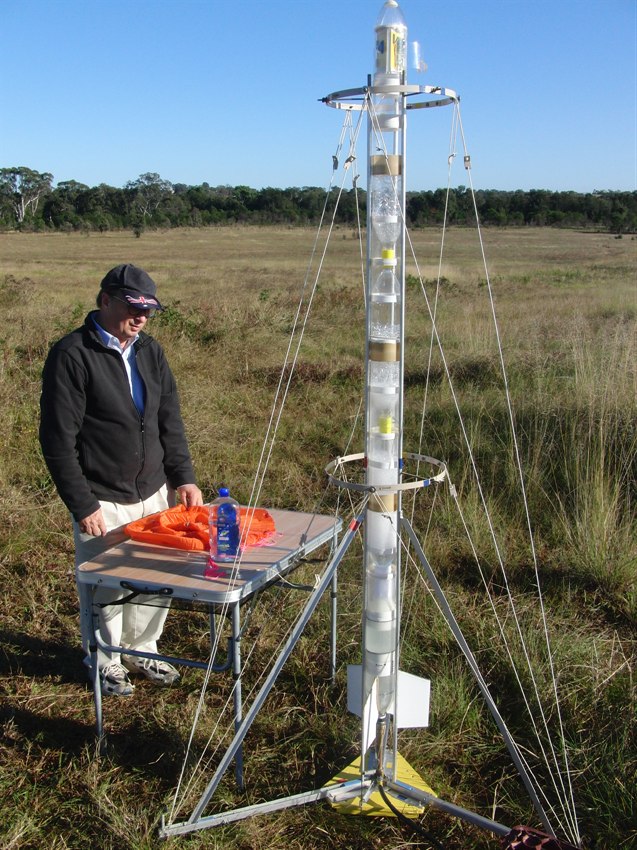
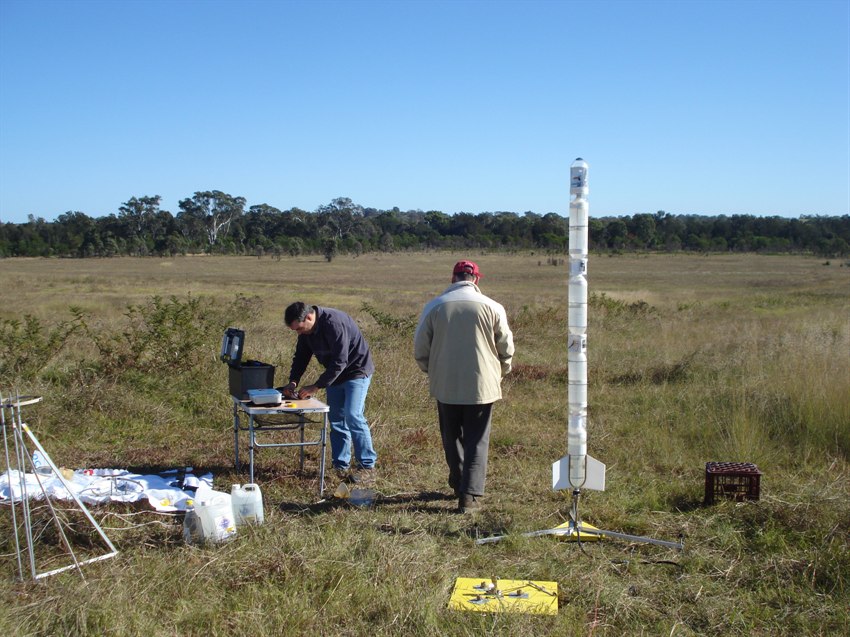
Axion VI, loaded up with water waiting for
the parachute to be packed. You can see the
yellow tornado tubes here.
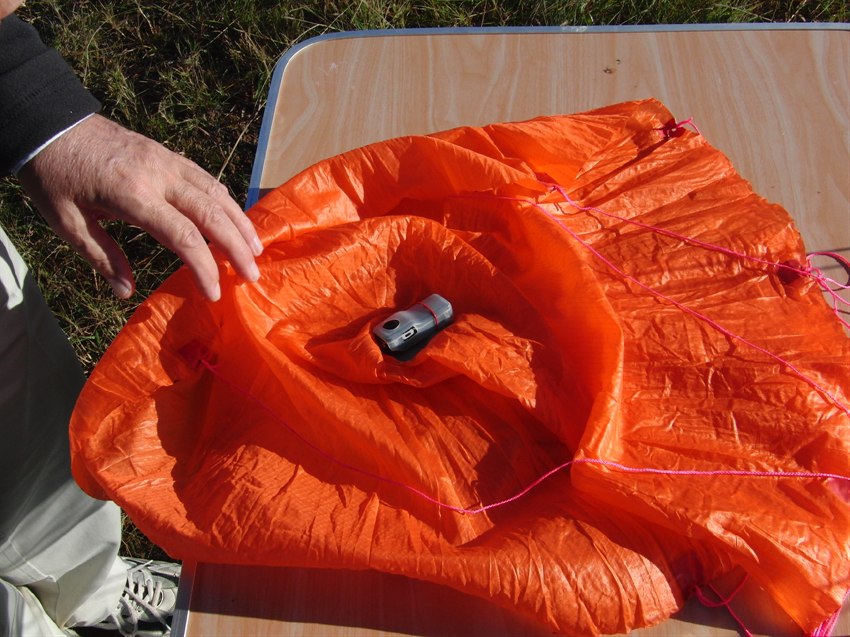
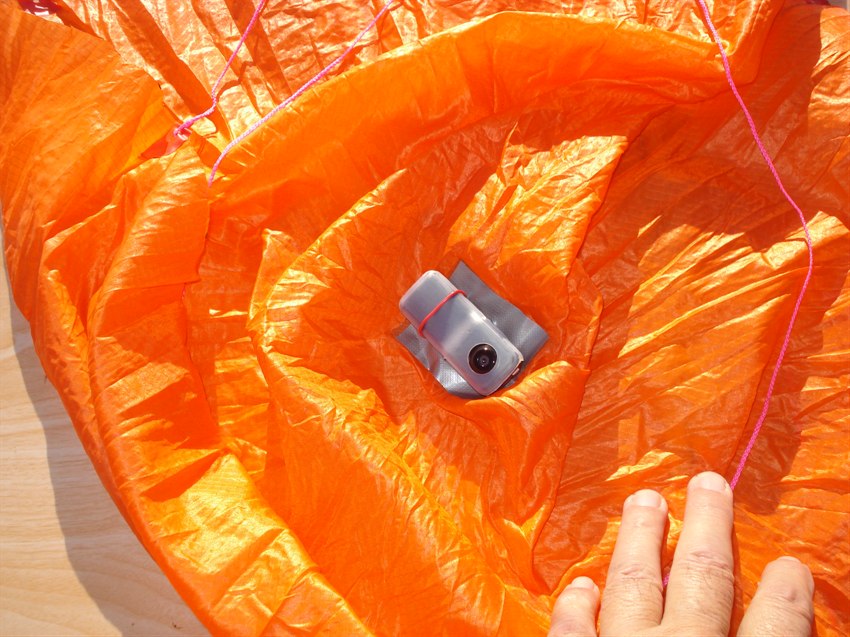
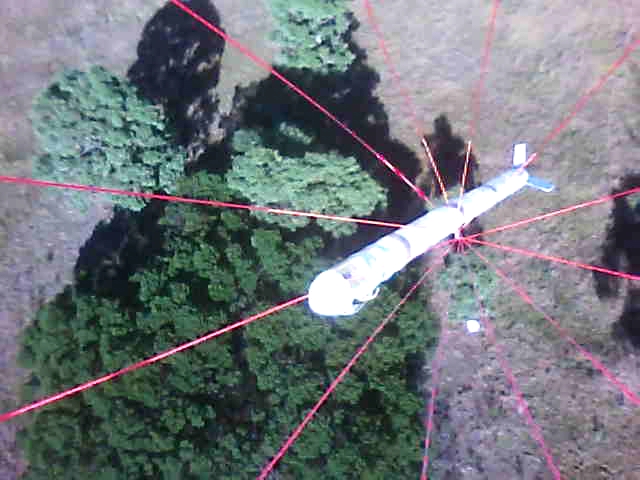
The MD-80 clone camera is attached to the
middle of the parachute looking down.
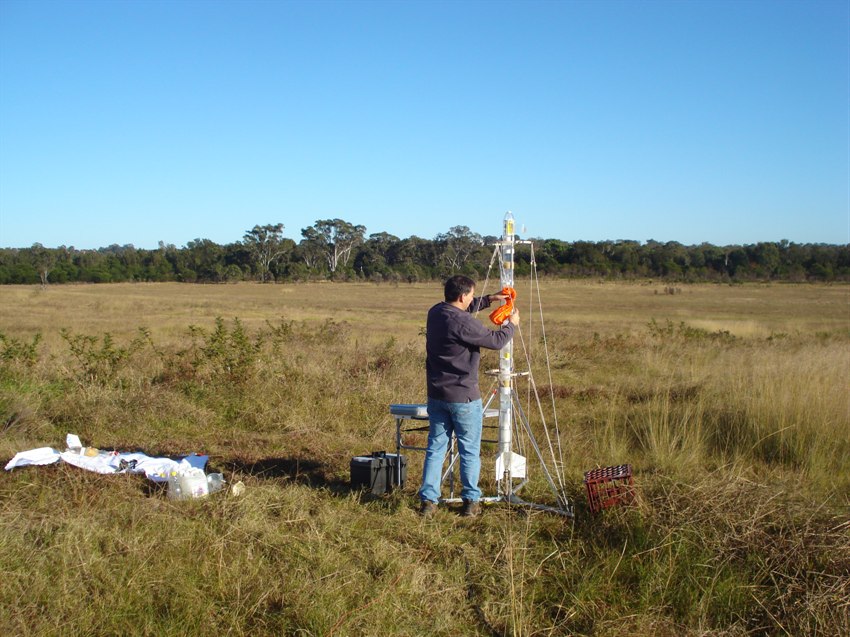
Threading the parachute through the launcher
prior to packing. You want to make sure it
doesn't get tangled up on the launcher.
Launched at 120psi.
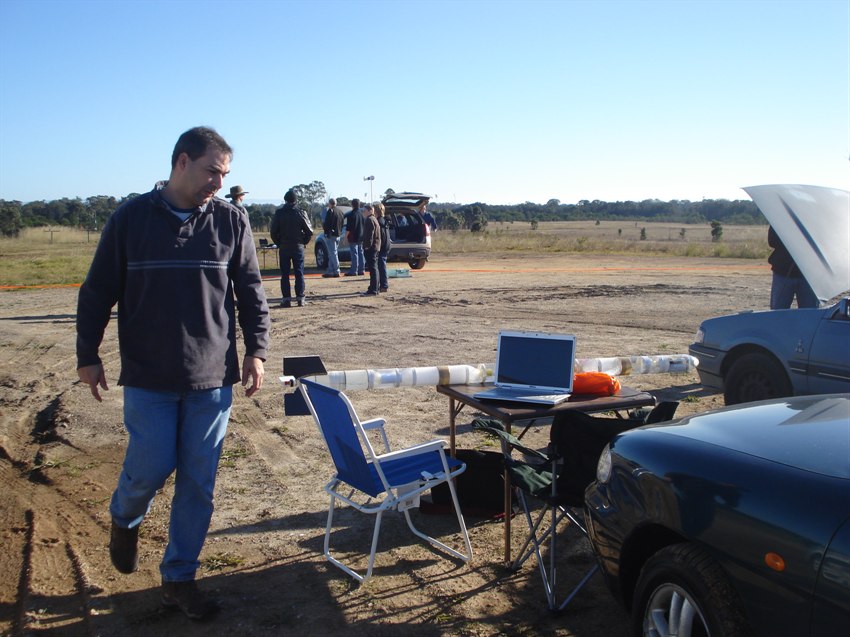
Back to the field office to download the
parachute cam video.
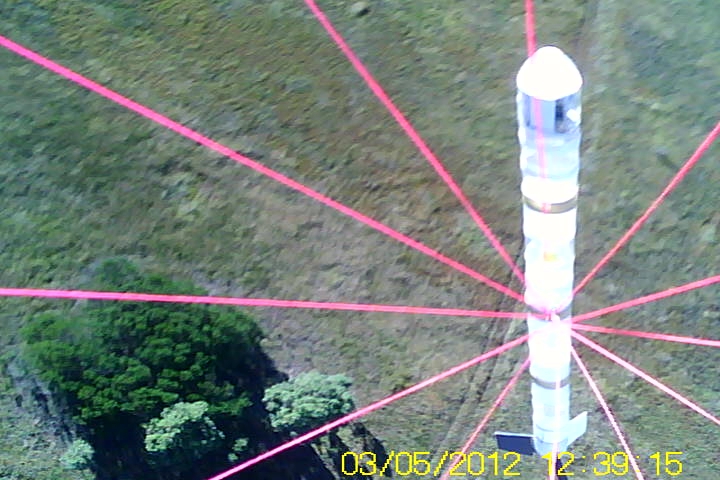
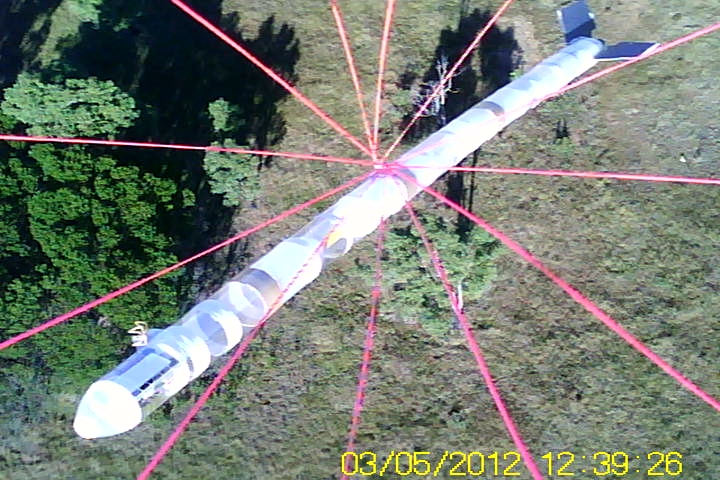
Rocket pointing towards the parachute.
Rocket draining residual foam from the
nozzle. You can see the parachute door open with
rubber bands attached.
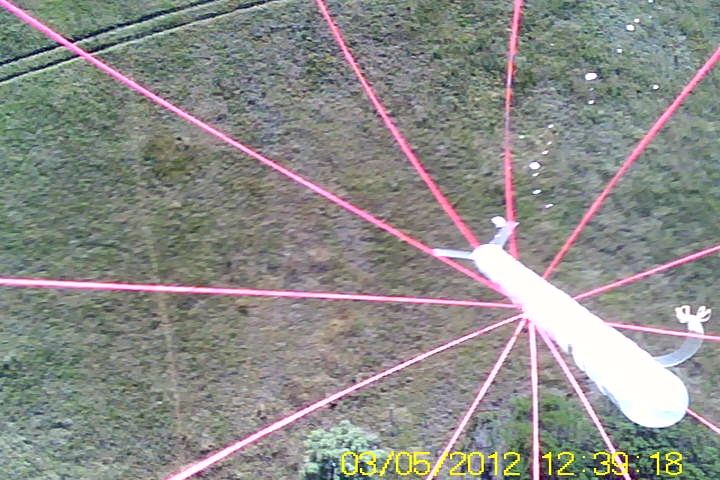
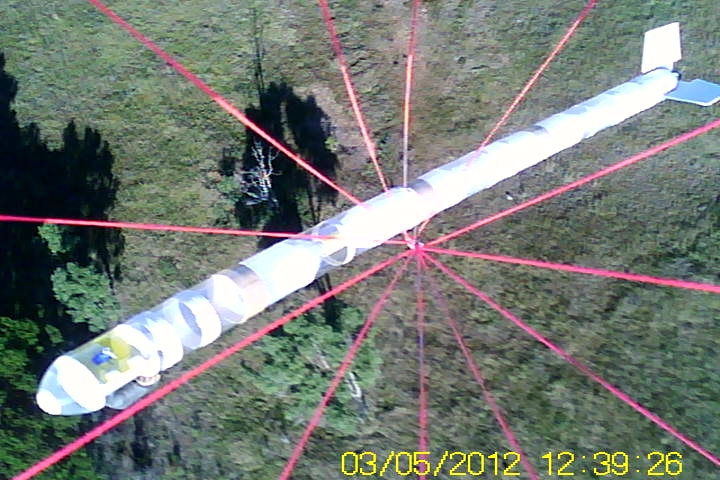
These two shots show how much the rocket
rolls on the parachute cord. This is the back of
the parachute bay
And a few moments later is the front of the
parachute bay.
Here we are flying the original and heavier
MD-80 camera.
Good launch again at 120psi.
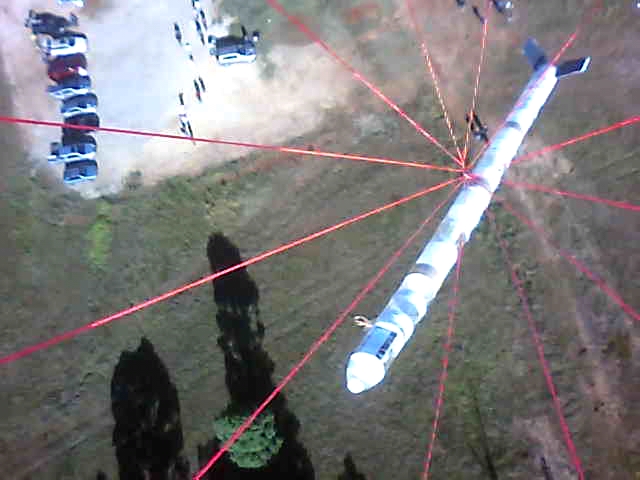
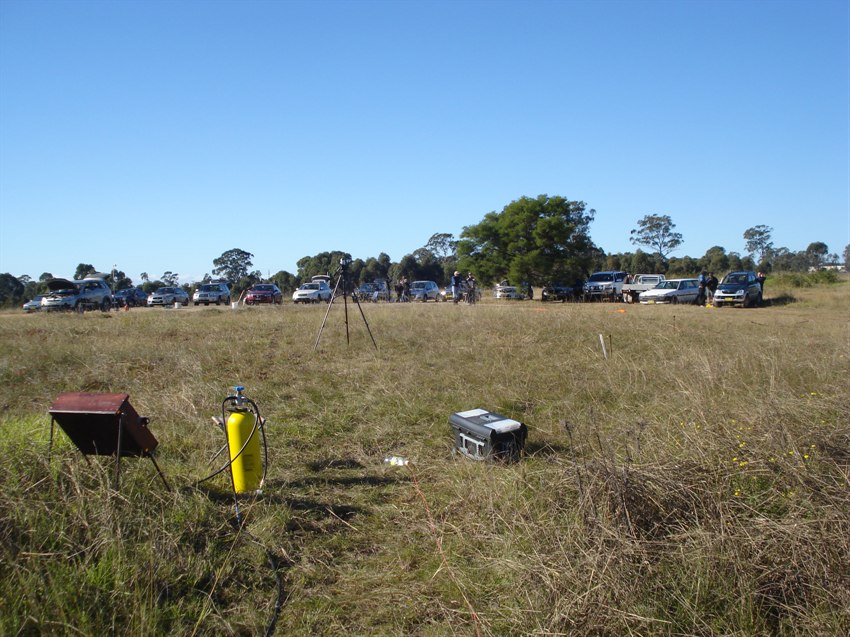
Looking back towards the car parking area.
The MD-80 has a wider field of view, but has
more subdued colours.
Looking back from the launcher towards the
car park.
A nozzle that looks crooked but is actually
aligned with the rocket axis.
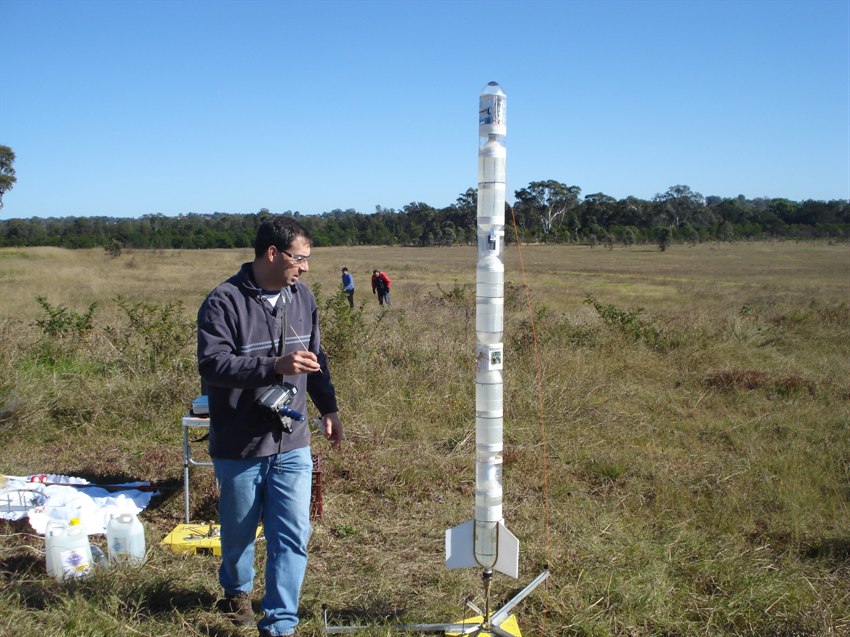
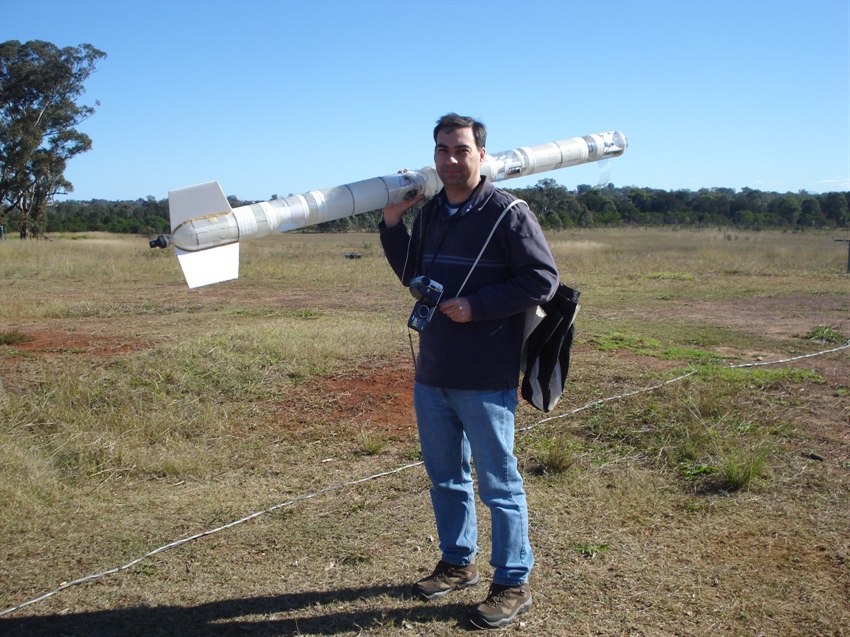
Getting Polaron G1 ready for it's maiden
flight.
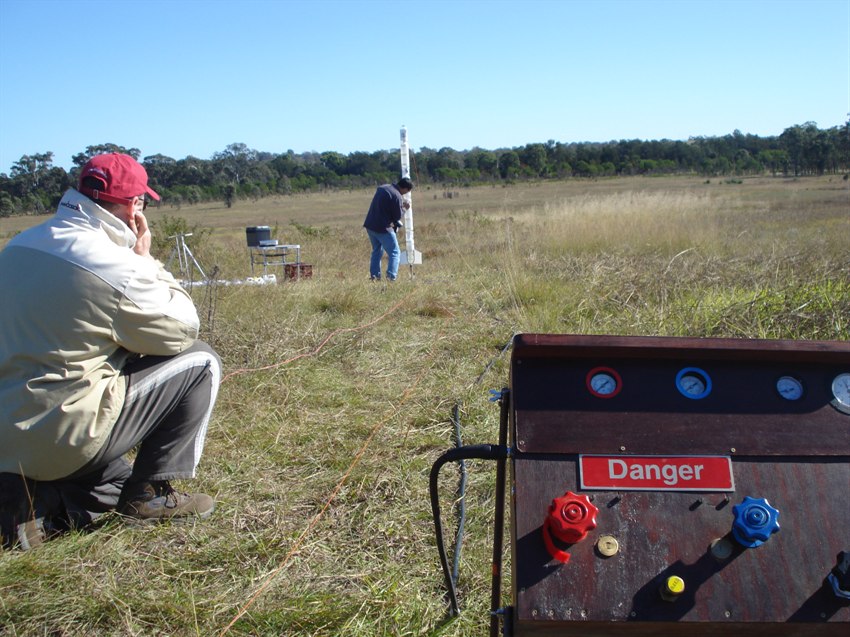
Safety goggles on, just in case we need to
get close to the rocket.
The orange line is the remote "arm" string,
and the pink one is the launch string.
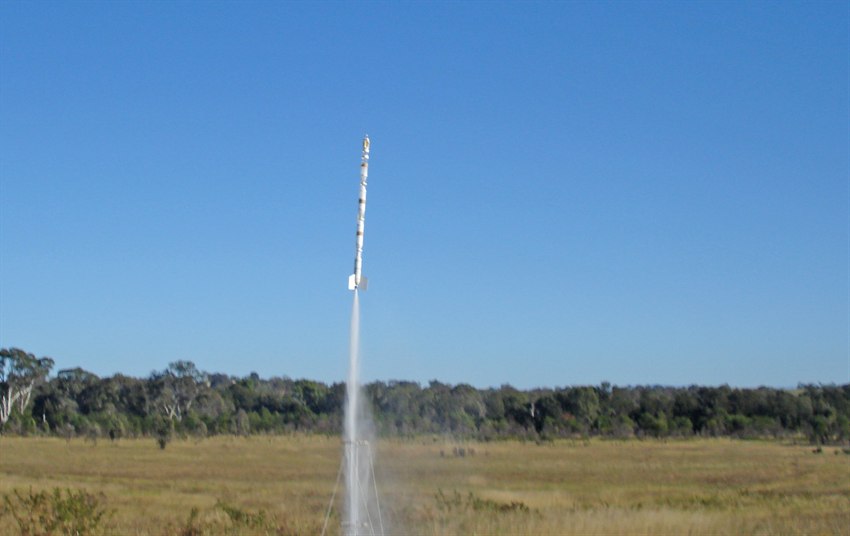
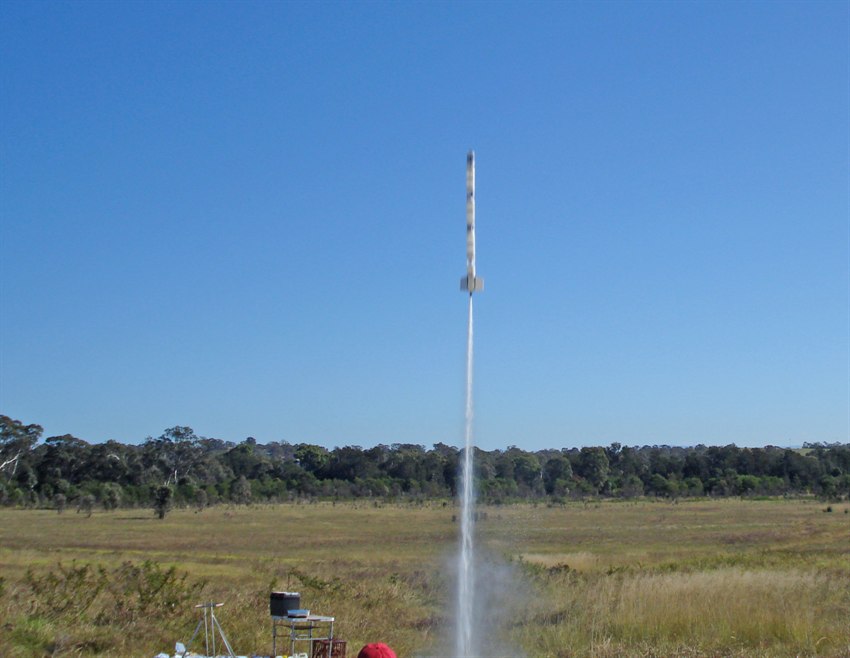
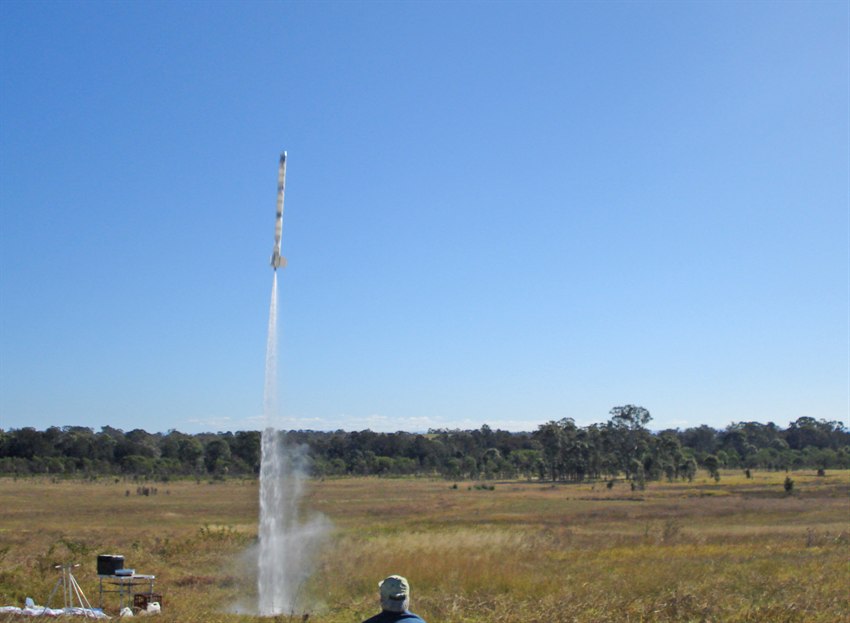
Good vertical launch at 220psi.
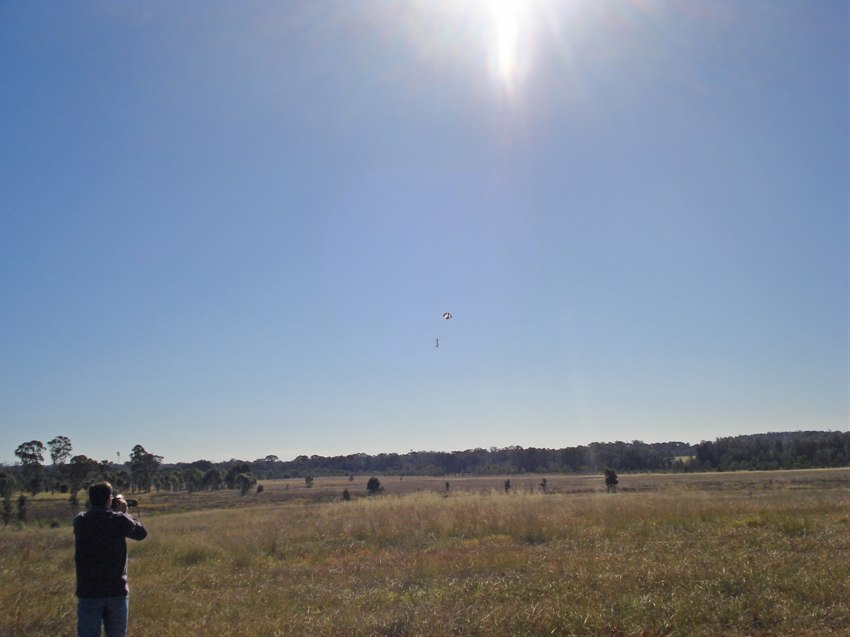
The rocket didn't drift too far.
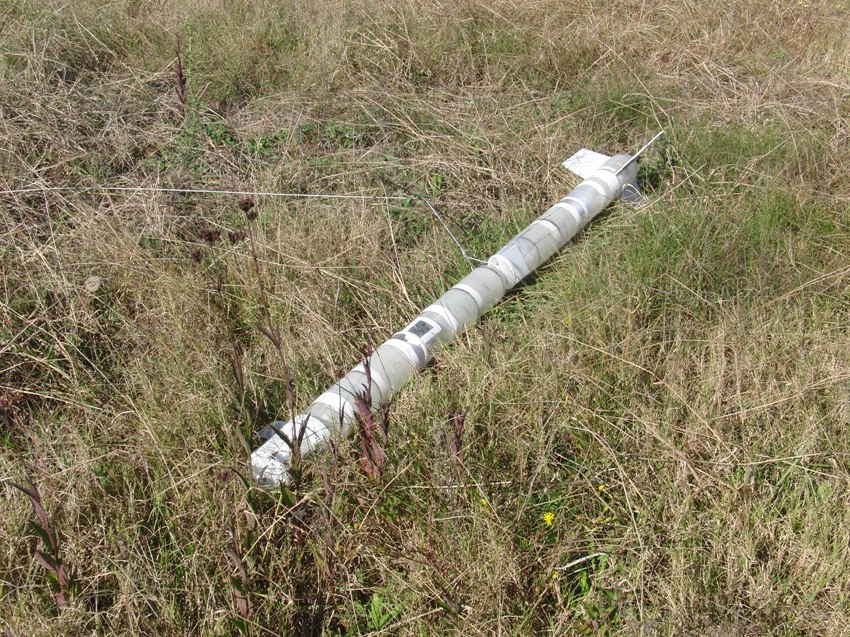
Gentle landings in tall grass are always
good.
The rocket reached 702'.
Second launch was at 230psi. The water
column seems a lot more turbulent.
Last launch of the day. Time to pack up and
head for home.
Altitude plot from the last flight. It
reached 751' (229m)
Date:13th June 2010
Location:Doonside, NSW, Australia
Conditions:Cool 17C, clear skies >10km/h wind.
Team Members at Event:PK and
GK
It has been a while since the last
update, but development has been progressing
well in the meantime. There were a couple of
launch postponements due to adverse weather
and hence the delay in our regular updates.
Website Changes
Welcome to our new home, It's kinda roomy
in here. :) We have now gone through the
full relocation of our main website to a new
host where we have 10Gb available up from
the old 50Mb. A lot of the larger photos
were also located on another server that now
have all been moved to the new server.
We've added a search function too, which
should make it easier to look for things on
our site. With the added room, we'll now
include larger images with our regular
updates.
Labs Website Extension
Now that we have the new space we have also
rolled out the
Water Rocket Labs extension we have been
working on. Initially it was going to be a
separate website, but we have decided to add
it as a subsection of this site as it makes
it easier to administer. The intention is to
add the results of any new experiments to
the Labs section and continue with our
regular launch reports, construction
details, and progress updates here as usual.
If you have data you would like to share
with others and have it included in the labs
section please let us
know.
Williams "Wildfire" Westernationals
2010
Last weekend I took some time off from work
and water rockets, and flew over to Perth in
Western Australia to attend the Williams
"Wildfire" Westernationals. Rocketeers from
all over Australia attended. There is only
one way to describe it.
Absolutely - freaking - AWESOME!!!
It was a great weekend of high power
rocketry. It was fantastic to see an N2000
motor make it's way skyward and the
associated noise to go with it. *grin* I
witnessed a number of Mach+ flights which
were amazing. Congratulations go to all the
guys who successfully completed their L1, L2
and L3 certification flights. It was very
much evident how much hard work and
dedication goes into the sport at this
level, and a great bunch of guys as well.
Very inspirational stuff.
A huge thank you goes to Scoop, Mel and all
those people who helped to organise and
cater the event. I had an absolute blast and
perhaps will have to take the whole family
over next year.
I've already posted one video but I'll be
putting together a few more from the weekend
over the coming weeks.
Right, back to water rockets.....
Polaron G1
Nozzle trouble
A week ago I made up a couple of new 15mm
and 16mm nozzles by epoxying long threaded
bottle caps into the quick connector
adaptors. I aligned the cap with the adaptor
and set it on a rotisserie to cure the glue
evenly. The cap sat nice and straight in the
threaded section.
The day before launch we were going to
pressure test these nozzles to make sure
they would be able to hold at least 250psi.
I screwed the nozzle onto the bottle and
noticed that it looked a little off-center.
We used the dowel through the nozzle
alignment check an noticed that indeed it
was off by perhaps 3 or 4 degrees. This was
a bit of a surprise and a worry, so we
checked the other nozzle and it was off by
about the same amount. DANG! ... less than
24 hours to launch and we didn't have a
nozzle!
The Polaron G1 is a heavy rocket so a
smaller existing nozzle couldn't really be
used. Launching a high pressure rocket, with
the thrust vector off centerline even by a
small amount is asking for trouble. So we
proceeded to remove the cap from the adaptor
since it was useless in this state. We had
to use the Dremmel and lathe to get rid of
it and the epoxy.
Next we screwed a new cap onto the end of
the rocket, placed the nozzle in the release
mechanism on the launch tube and placed the
whole rocket on the launch tube as well.
This made sure that the adaptor and cap were
aligned relative to each other. The mis-alignment
was due to a combination of how the cap sits
slightly askew when tightened on the bottle
(wasn't aware of this previously), and the
fact that the adaptor moulding is not very
straight either. We could see this easily on
the lathe. A part of the moulding was
concentric where the o-ring was, but the
threaded section was wobbling about the
axis.
We used the 24 hour epoxy as it is much
stronger than the 5 minute stuff. We then
used a heat gun to try to accelerate the
cure time, and placed the whole thing in
front of the heater to cure, but not hot
enough to shrink the bottles.
We were going to have to pressure test
the nozzle on the launch pad on launch day.
If the glue failed, then the rocket should
still launch, but with a much bigger nozzle!
When you looked at the nozzle by itself it
looked crooked with the cap, but when
tightened on the rocket it aligned very
well.
Remote Arming
We also added a remote arming system to
the flight computer after the vibration
failures last time. This consisted of a set
of contacts wired in parallel to the ARM
button and spring loaded to close
automatically. There was a piece of plastic
inserted between the contacts and this
plastic was tied to another string. After
the rocket is pressurised, simply pulling on
the string allows the contacts to make a
connection arming the computer. The launch
detect then works as normal.
Tornado Tubes
Since we have previously only
hydrostatically tested the commercial
Tornado
tubes, we wanted to test fly them to see
how they perform in flight. We assembled one
rocket (Axion VI) using the Tornado tubes.
Because of the sealing and cracking problems
when over tightened, we used a couple of
soft internal washers to give a better seal.
These washers are custom made for our
Acceleron rocket nozzles that fit in a
bottle cap and have a large hole. They
worked well in the Tornado tubes.
Parachute Cam
For the tornado tube test flights we
decided to mount a camera in the center of
the parachute looking down just to get a
different perspective of the rocket in
flight. It had nothing to do with the
Tornado tubes. We weren't sure if the weight
of the camera was going to cause the
parachute to deflate, or fail to inflate all
together. But what the heck, there was only
one way to find out and that was to fly it.
We put two pieces of gaffer tape on
either side of the parachute and punched a
number of holes through it. We then secured
the camera with a couple of pieces of wire
twisted at the back.
Launch Day Report
We had two main objectives for this
launch. We wanted to test fly the commercial
tornado tubes on a proper rocket as well as
test fly the fiberglass Polaron G1 that
hadn't flown previously due to high wind
conditions.
When we arrived at the launch site
the weather was near perfect. We had
blue sky and very little wind.
We set up the launcher to launch the
90mm Axion VI with the long guide rail
extensions. The launch was going to be
slow so we wanted maximum rail length.
We filled the rocket with water and
loaded it onto the launcher but didn't
pack the parachute as we needed to turn
the camera ON before packing it into the
nosecone. Luckily there was enough room
for both the camera and parachute in the
side deployment mechanism, though it took a couple of
goes to figure out how to fold the
parachute with the camera in it.
We used the MD-80 clone camera for the
flight as it is only half the weight of
the original MD-80.
The launch was pretty slow at 120psi
but the rocket reached good altitude and
the parachute opened fine without
issues. On the way down we really
couldn't see any difference in the shape
of the chute which was good.
After landing we downloaded the video to
the laptop but it looked all blank. That
was disappointing, but the camera had
recorded a correct length movie. I was
hoping that it was only the laptop that
was having issues with a codec, and in
checking the video later at home on the
PC, to our relief it played fine without
trouble.
Since we didn't know what the issue
was with the camera at the time, we
swapped it for the original MD-80 for
the next flight.
The second flight was very similar
to the first and good video was recorded
from inside the parachute. You could
tell that the MD-80 has a slightly wider
field of view than the clone.
Due to the softness of the material the
camera was mounted on, the video is
naturally quite shaky. The slow video scan
rate also tends to distort
the fast moving image giving the
impression of a bending rocket and
shroud lines.
On the second flight you could see that
the parachute at times appeared to move
like a jelly fish due to the camera in
the middle, but it did not appear to
have any bad effects on chute
performance.
In any case we were quite happy with the
results. The tornado tubes also
performed well, so we will be using them
in upcoming rockets.
We then configured the launcher for
the Polaron G1 launches. We replaced the
9mm Gardena release head with the 15mm
one and a 1.2m launch tube.
We installed the remote arming
string and pinned it down with a brick
so it wouldn't accidentally pull away.
The arming system worked well and
allowed us to arm the rocket from a safe
distance after the pressurising stopped.
The advantage with this system was that
if the rocket had launched by itself,
the arming string would have been pulled
out arming the computer, and the launch
would be detected shortly afterward so
the rocket had every chance of
recovering safely.
The first flight was with 3L of
water and a 220psi launch
pressure. The rocket went up very
straight, and thankfully the epoxied nozzle
held. The rocket reached an altitude of
702' (214m) which was lower than
what the sims predicted, but the nose on this
rocket is fairly blunt and probably had
a higher drag at these speeds. The rocket
landed well without issues.
On the second flight we pressurised
it to 230psi and again used the
remote arming string prior to launch.
This time the rocket went to 751'
(229m) which was again lower than
expected, but it was our highest single
stage flight. The rocket again landed
well with only slight buckling to one of
the fairings because the parachute cord
slipped down the rocket and tightened
around the unreinforced section as the
parachute opened. The pressure vessel
was okay.
The G1 tests were really an
evaluation on how these 2L reinforced
bottles work in practice, and eventually
will be used to replace the Acceleron V
booster segments.
Thanks to David, Craig and Adrienne
for helping launch the rockets as our
regular launch crew was away visiting
friends in the Blue Mountains.
Very nice straight
flight with little roll. Craig's
computer could not be configured
properly prior to launch and so was
just a passenger. The rocket landed
without issues, and good altimeter
and video data were obtained.
Also a very nice
straight flight with good data
obtained from both altimeter and
video. The parachute line slipped a
little and buckled a fairing,
otherwise the rocket landed well
without issues.